Open post

christmas carol lyrics pdf free download

Discover a convenient way to enjoy festive music with free Christmas carol lyrics in PDF format. Easily downloadable and printable, these files offer classic songs for caroling, parties, or home use.

1.1 Overview of Christmas Carol Lyrics Availability Online

Christmas carol lyrics are widely available online in PDF format, offering a convenient way to access festive songs. Websites provide free downloadable sheets, featuring classic carols like “Silent Night” and “Jingle Bells.” Many platforms allow users to print these lyrics for personal or group use, making them ideal for caroling events or holiday gatherings. The diversity of carols spans traditional and modern compositions, ensuring a variety of options for all preferences. Downloading these PDFs is straightforward, with many sources offering high-quality, printable versions for free.

1.2 Benefits of Downloading Christmas Carol Lyrics in PDF Format

Downloading Christmas carol lyrics in PDF format offers numerous advantages for festive celebrations. PDFs ensure consistent formatting and readability across devices, making them ideal for printing or digital viewing; Users can easily share files with groups, perfect for caroling events or family gatherings. Additionally, PDFs often include colorful designs and sheet music, enhancing the visual appeal. This format also allows for easy customization, such as adjusting font sizes or adding covers, ensuring a personalized touch. Overall, PDF downloads provide a practical and versatile way to enjoy holiday songs.

Popular Sources for Christmas Carol Lyrics PDF Downloads

Popular websites like adamprintables.com and others offer free Christmas carol lyrics PDF downloads, providing easy access to festive songs for caroling and celebrations.

2.1 Websites Offering Free Printable Christmas Carol Lyrics

Several websites provide free printable Christmas carol lyrics in PDF format. Sites like adamprintables.com and Christmas Corner offer extensive collections of classic carols. These platforms allow users to download and print lyrics for personal or group use, making them ideal for caroling events or holiday gatherings. Many sites also include public domain songs, ensuring free and legal use. Additionally, some websites offer customizable options, such as adjusting font sizes or adding covers, to enhance your carol sheet experience.

2.2 Recommended Platforms for High-Quality PDF Downloads

For high-quality Christmas carol lyrics PDFs, consider platforms like adamprintables.com and Christmas Corner. These sites offer crisp, professional layouts and vibrant designs, ensuring your prints look exceptional. Many platforms provide customizable options, such as adjustable font sizes and colorful illustrations. They also include a wide range of classic carols, from “Silent Night” to “Jingle Bells”. Additionally, some sites offer sheet music for instruments, making them a versatile choice for musicians and carolers alike. These PDFs are free, easy to access, and perfect for festive celebrations.

Step-by-Step Guide to Downloading Christmas Carol Lyrics

Visit trusted websites, select your desired carols, and download the PDF files. Print the lyrics at home or at a local print shop for easy access.

3.1 How to Find and Access Free Christmas Carol Lyrics PDFs

To find free Christmas carol lyrics in PDF format, visit reputable websites like Christmas-corner.com or Adamprintables.com. Use search terms such as “free printable Christmas carol lyrics” or “Christmas carols PDF download.” Many sites offer instant downloads with festive designs. Look for public domain carols to ensure legal use. Once downloaded, open the PDF using a reader like Adobe Acrobat. Print the sheets on standard paper or cardstock for a durable finish. Ensure your printer settings match the file’s dimensions for optimal results. This method provides quick access to your favorite holiday songs, perfect for caroling or home gatherings.

3.2 Tips for Printing Christmas Carol Lyrics at Home

For high-quality printing of Christmas carol lyrics, use cardstock or thick paper for durability. Set your printer to high-resolution settings and ensure the orientation matches the PDF layout. Adjust margins to prevent text from being cut off. Choose between color or black-and-white printing to save ink while maintaining readability. Consider binding the sheets with staples or a small binder for easy handling. Adding a personalized cover or decorative borders can enhance the festive appeal. This ensures your carol lyrics are both functional and visually appealing for holiday gatherings.

Popular Christmas Carols Included in Free PDF Downloads

Explore timeless classics like Silent Night, Joy to the World, Jingle Bells, and Deck the Halls in free PDF downloads, perfect for caroling and festive gatherings.

4.1 “Silent Night” and “Joy to the World” Lyrics

Silent Night and Joy to the World are beloved carols featured in free PDF downloads. Silent Night captures the serene moment of Jesus’ birth, while Joy to the World celebrates His arrival with triumphant joy. These lyrics, often included in printable booklets, are perfect for caroling or holiday gatherings. Available in public domain, they ensure free and legal use for everyone. Their timeless melodies and meaningful words make them essential additions to any festive celebration.

4.2 “Jingle Bells” and “Deck the Halls” Lyrics

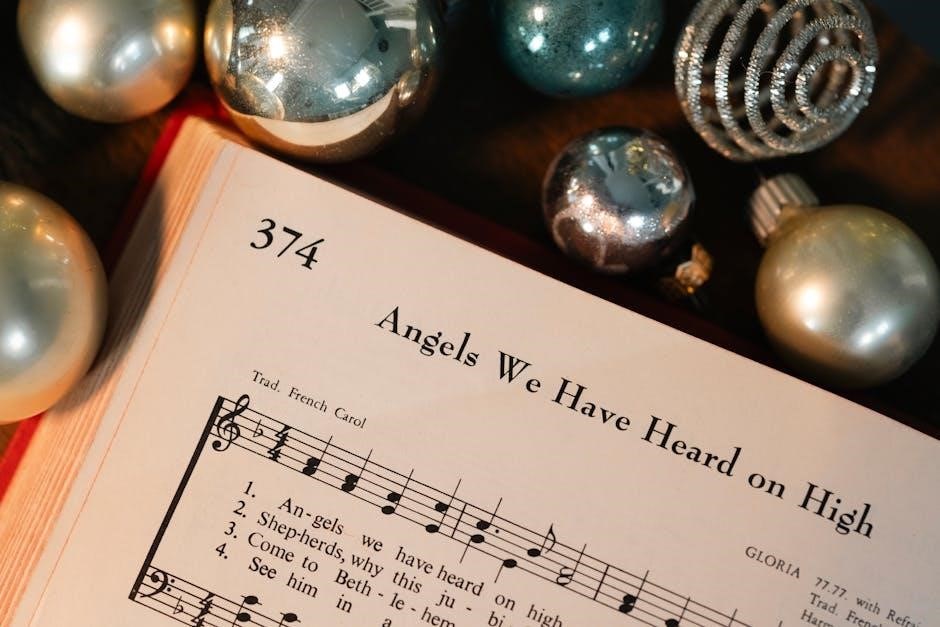
Jingle Bells and Deck the Halls are vibrant Christmas carols widely available in free PDF downloads. Jingle Bells, with its catchy melody, evokes the joy of sleigh rides, making it a favorite for children and carolers alike. Deck the Halls features a lively “Fa la la” chorus, celebrating festive traditions. Both songs are included in printable lyric sheets, perfect for holiday gatherings. Their upbeat rhythms and nostalgic charm ensure they remain timeless classics for festive celebrations.

Customizing Your Christmas Carol Lyrics PDF

Personalize your Christmas carol PDFs by adding custom covers or illustrations. Adjust font sizes for readability and enhance the visual appeal of your festive songbook.

5.1 Adding Personalized Covers or Illustrations

Add a personal touch to your Christmas carol PDF by including custom covers or illustrations. Use festive graphics, holiday-themed borders, or personal photos to create a unique and visually appealing songbook. Websites like Christmas Corner and Adam Printables offer free holiday graphics that can be downloaded and inserted into your PDF. Tools like Canva or Adobe Acrobat allow you to design and edit covers effortlessly. This personalization makes your carol book stand out and adds a special flair to your holiday celebrations or gifts for friends and family.

5.2 Adjusting Font Sizes for Better Readability

Easily customize your Christmas carol PDF by adjusting font sizes to improve readability. Larger text is ideal for groups or younger participants, while smaller fonts save space for longer songs. Use software like Adobe Acrobat or free online PDF editors to modify text size. Ensure lyrics remain clear and legible, especially for caroling events or printed booklets. Some PDFs also offer pre-formatted options for readability, making it easy to print and share with your group. This customization ensures everyone can enjoy singing along comfortably.

Legal Considerations for Using Christmas Carol Lyrics

Ensure compliance with copyright laws when using Christmas carol lyrics. Many classic carols are in the public domain, but modern arrangements may require permission for use or distribution.

6.1 Understanding Public Domain and Copyright Laws

Christmas carol lyrics often fall under public domain or copyright laws. Classic carols like Silent Night and Joy to the World are typically in the public domain, meaning they can be freely used. However, specific arrangements or modern adaptations may still be copyrighted. Always verify the copyright status before distributing or modifying carol lyrics. Using public domain works ensures legal and free usage, while copyrighted material requires permission from the rights holder to avoid infringement.

6.2 Ensuring Free and Legal Use of Christmas Carol Lyrics

To ensure free and legal use of Christmas carol lyrics, always verify their copyright status. Many classic carols are in the public domain, making them freely usable. However, specific arrangements or modern versions may still be copyrighted. Use reputable sources offering free PDF downloads, as they often ensure compliance with copyright laws. When in doubt, opt for public domain carols or seek permission from copyright holders. Giving proper credit and avoiding modifications to copyrighted works helps maintain legal use and respect for intellectual property.

Devices and Software for Viewing and Printing PDFs

Use PDF readers like Adobe Acrobat or FoxitReader for seamless viewing. Print high-quality lyrics using reliable printers like HP or Canon for crisp, festive carol sheets.

7.1 Recommended PDF Readers for Windows and Mac

For seamless viewing of Christmas carol lyrics, use trusted PDF readers like Adobe Acrobat Reader or FoxitReader on Windows. On Mac, Preview is a built-in, user-friendly option. These tools support annotations, zoom, and printing, ensuring crisp text for caroling. Download links are widely available, and most are free, making them accessible for everyone. Choose one that fits your needs to enjoy high-quality PDFs effortlessly during the holiday season.

7.2 Best Printers for High-Quality Christmas Carol Lyrics Sheets

For crisp and vibrant printing of Christmas carol lyrics, consider using high-resolution inkjet or laser printers. Models like the HP Envy or Canon PIXMA series are ideal for clear text and colorful designs. Epson printers, such as the Ecotank series, offer cost-effective and reliable performance. Ensure your printer supports high-quality paper for professional-looking sheets. Wireless connectivity is a bonus for easy printing from devices. These printers guarantee sharp lyrics and festive designs, making your carol sheets stand out during holiday gatherings.

Creative Ways to Use Christmas Carol Lyrics PDFs

Use Christmas carol lyrics PDFs to create festive holiday crafts, decorate cards, or organize caroling events. They also make great educational tools for teaching children classic songs.

8.1 Organizing Caroling Events with Printable Lyrics

Organizing caroling events is made effortless with printable Christmas carol lyrics in PDF format. Download and print classic carols like “Silent Night” and “Joy to the World” to ensure everyone sings in harmony. These free resources are perfect for distributing to groups, whether for neighborhood caroling or church gatherings. The clear, formatted text makes it easy for participants to follow along, fostering a joyful and unified singing experience. Use these PDFs to create a memorable and organized holiday tradition that everyone can enjoy together.

8.2 Using Lyrics for Holiday Crafts and Decorations

Transform Christmas carol lyrics into charming holiday crafts and decorations. Print the PDF files on festive paper and frame them as wall art or use them as inserts for holiday cards. Cut out specific verses to create collages or decoupage for gift boxes. You can also laminate the lyrics for reusable place settings or incorporate them into scrapbook pages. Adding a personal touch, these printed carols bring a heartfelt, traditional vibe to your holiday decor, making your celebrations even more special and meaningful.

With free Christmas carol lyrics PDFs, you can effortlessly print and share festive songs, ensuring everyone joins in the holiday spirit. Happy caroling!

9.1 Final Tips for Enjoying Free Christmas Carol Lyrics PDFs

For a joyful experience, download PDFs from reputable sources to ensure quality and clarity. Print on both sides to save paper and bind sheets into a booklet for easy handling. Highlight key lyrics to memorize favorites quickly. Share the PDFs with friends and family to spread the festive spirit. Consider adding personalized covers for a unique touch. Most importantly, ensure all downloads are copyright-free to support legal and ethical use of these holiday treasures.

9.2 Sharing the Joy of Christmas Carols with Others

Spread the festive spirit by sharing free Christmas carol lyrics PDFs with friends, family, and community groups. Print and distribute copies for caroling events or holiday gatherings. Encourage others to join in singing by ensuring everyone has access to the lyrics. Share the PDFs via email or social media to reach a wider audience. This thoughtful gesture fosters togetherness and joy, making the holiday season brighter for all. By sharing, you help keep the tradition of Christmas carols alive and vibrant.

Open post

manual for lasko heater

Welcome to the Lasko Heater Manual, your essential guide for safe and efficient operation. This manual provides detailed instructions for installation, usage, and troubleshooting your Lasko heater. Designed to ensure optimal performance, it covers key features, maintenance tips, and safety precautions. Whether you’re a first-time user or seeking to maximize your heater’s potential, this manual is your go-to resource for understanding and maintaining your Lasko product effectively.

1.1 Importance of Reading the Manual

Reading the Lasko heater manual is crucial for safe and efficient operation. It provides essential guidelines to ensure optimal performance, prevent overheating, and troubleshoot common issues. The manual outlines key safety precautions, operation instructions, and maintenance tips to prolong the heater’s lifespan. By understanding the features and settings, users can avoid common mistakes and make the most of their Lasko heater. It also helps users identify and resolve problems quickly, ensuring reliable heating and energy efficiency throughout the year.

Installation and Initial Setup

Start by placing the heater on a flat, stable surface away from flammable materials. Plug the unit into a 120V electrical outlet, ensuring proper ventilation. Allow the heater to cool before handling. Follow the manual’s step-by-step guide for initial setup to ensure safe and efficient operation. Always adhere to the manufacturer’s guidelines for placement and power connection to avoid potential hazards.

2.1 Step-by-Step Installation Guide

  • Place the heater on a flat, stable surface away from flammable materials.
  • Plug the unit into a 120V electrical outlet, ensuring proper ventilation.
  • Check for any obstructions around the heater to prevent overheating.
  • Allow the heater to cool down completely before moving or handling.
  • Follow the manual’s instructions for initial power-up and settings configuration.

These steps ensure safe and efficient operation of your Lasko heater.

Operating the Lasko Heater

Learn to operate your Lasko heater safely with this guide. Understand basic controls, temperature settings, and advanced features like Auto-Eco mode for energy efficiency. Follow manual instructions.

3.1 Understanding Basic Operations

Mastering the basics of your Lasko heater ensures safe and effective use. Begin by plugging the unit into a 120V electrical outlet and turning it on. The power light will illuminate, indicating it’s operational. Adjust the temperature setting using the control panel or remote, if available. Ensure the heater is placed on a stable, flat surface away from flammable materials. Regularly check the power cord and avoid touching hot surfaces. Always follow the manual’s guidelines for optimal performance and safety. Proper operation enhances efficiency and longevity of your Lasko heater.

3.2 Advanced Features and Settings

Explore advanced features to enhance your heating experience. The Auto-Eco Mode adjusts heat output based on room temperature for energy efficiency. Utilize the built-in timer to schedule operations, ensuring your space is warm when needed. Some models offer oscillation for even heat distribution and remote control for convenience. Adjust settings via the digital display to customize comfort. These features optimize performance, reduce energy consumption, and provide a tailored heating solution. Refer to the manual for specific instructions on activating and using these settings effectively. Proper use ensures maximum benefits and longevity of your Lasko heater.

Maintenance and Cleaning

Regular maintenance ensures your Lasko heater operates safely and efficiently. Clean the unit every two weeks to prevent dust buildup, which can cause overheating. Use a soft cloth to wipe exterior surfaces and gently brush internal components. Always unplug the heater before cleaning. Proper care extends the lifespan and maintains performance. Follow the manual’s guidelines for deep cleaning and filter maintenance to keep your heater functioning optimally.

4.1 Regular Cleaning Schedule

Establishing a regular cleaning schedule is crucial for maintaining your Lasko heater’s efficiency and safety. Clean the exterior with a soft cloth every two weeks to remove dust and debris. Gently brush internal components, ensuring no buildup occurs. Always unplug the heater before cleaning to avoid electrical hazards. Regular maintenance prevents overheating issues and ensures optimal performance. Follow this routine to keep your heater running smoothly and extend its lifespan.

4.2 Deep Cleaning and Filter Maintenance

Perform deep cleaning every three months for optimal heater performance. Remove and wash the filter with mild soap and water, allowing it to dry completely before reinstalling. Use a soft brush to clean internal vents and grilles, ensuring no dust buildup. Avoid harsh chemicals to prevent damage. Regular filter maintenance enhances air quality, reduces energy consumption, and prevents overheating. Follow these steps to keep your Lasko heater functioning efficiently and prolong its service life.

Troubleshooting Common Issues

This section helps resolve common problems like unexpected shutdowns or display errors. Resetting the heater, checking power sources, and ensuring proper ventilation often fix issues quickly.

5.1 Power Issues and Resetting the Heater

If your Lasko heater stops working, check the power cord and outlet. Ensure it’s plugged into a working 120V outlet. If issues persist, reset by unplugging for 10-15 minutes. This resets internal safety features. After resetting, plug back in and test operation. Remember to always use the correct voltage to avoid damage. Regular resets can prevent unexpected shutdowns caused by power fluctuations or overheating, ensuring reliable performance and extending the heater’s lifespan. Always follow safety guidelines during resets.

5.2 Overheating and Safety Features

Your Lasko heater is equipped with advanced safety features to prevent overheating. If the unit reaches a high temperature, it will automatically shut off to ensure safe operation. This feature protects both the device and its surroundings from potential damage. Regular cleaning is essential to avoid dust buildup, which can trigger overheating. Always follow the recommended maintenance schedule and avoid blocking the heater’s vents or grills. These safety measures ensure reliable performance and peace of mind during usage. Adhere to guidelines for optimal function.

5.3 Display Errors and Solutions

If your Lasko heater displays an error code, such as “88,” it may indicate a specific issue. First, unplug the unit for 10-15 minutes to reset it. Ensure the power cord is securely plugged into a working outlet. Check for any blockages or dust buildup that could trigger the error. If the issue persists, refer to the troubleshooting section of your manual for detailed solutions. Consulting the manual or contacting customer support can provide clarity and resolve display-related problems effectively. Always follow safety guidelines when addressing errors.

Safety Precautions and Guidelines

Always place your Lasko heater on a stable, flat surface away from flammable materials. Keep it at least 3 feet away from water and combustible objects. Ensure children and pets maintain a safe distance to avoid burns or accidents. Never operate the heater near water or in humid environments. Follow all safety guidelines in the manual to prevent overheating and ensure safe operation. Regular cleaning and maintenance are crucial for optimal performance. By adhering to these precautions, you can enjoy a safe and efficient heating experience with your Lasko heater. Always prioritize safety to avoid potential hazards and ensure longevity of the product. Refer to the manual for detailed instructions on proper placement and usage. Keep the heater out of reach of children and pets to prevent accidental damage or injury. Avoid using damaged cords or plugs, as they can pose a fire risk. If you notice any malfunction, stop using the heater immediately and consult the troubleshooting section. Proper care and adherence to guidelines will ensure your Lasko heater operates safely and effectively throughout the season. Stay informed and proactive to maintain a secure environment while using your heater. Safety should always be your top priority when operating any electrical appliance.

6.1 Placement and Usage Guidelines

Place your Lasko heater on a stable, flat surface away from water and flammable materials. Ensure it is at least 3 feet away from curtains, bedding, or furniture to prevent fire hazards. Avoid placing it on carpets or rugs, as this can block airflow and cause overheating. Never operate the heater in wet conditions or near water sources. Always use the heater in a well-ventilated area and avoid leaving it unattended or running continuously for extended periods. Follow these guidelines to ensure safe and efficient operation.

6.2 Child and Pet Safety

Keep the Lasko heater out of reach of children and pets to avoid accidental burns or injuries. Never leave the heater unattended while it is in operation. Ensure children understand the importance of not touching or tampering with the device. Pets should be supervised to prevent them from knocking over or damaging the heater. Always turn off the heater when leaving the room and use the built-in safety features to prevent overheating or tip-over incidents. Prioritize caution to protect your family and pets.

Energy Efficiency and Cost Savings

Optimize energy consumption with Lasko’s Eco-Mode, designed to balance comfort and efficiency. Follow energy-saving tips to reduce costs while maintaining a cozy environment.

7.1 Eco-Mode and Energy-Saving Tips

Eco-Mode on your Lasko heater automatically adjusts heat output to maintain a set temperature, optimizing energy use. To save energy, set a consistent temperature, use a programmable thermostat, and ensure proper room insulation. Regular maintenance, like cleaning filters, also improves efficiency. By using Eco-Mode and following these tips, you can reduce energy consumption and lower your heating costs without compromising comfort.

Innovative Technology and Features

Lasko heaters feature cutting-edge technology, including Auto-Eco Mode, digital displays, and smart sensors. These innovations enhance energy efficiency and user convenience, ensuring reliable performance and comfort.

8.1 Auto-Eco Mode Explained

The Auto-Eco Mode is a cutting-edge feature designed to optimize energy usage while maintaining comfort. It uses smart sensors to monitor room temperature and automatically adjusts the heater’s settings to balance efficiency and performance. This mode ensures the heater runs only when necessary, reducing energy consumption without compromising warmth. By dynamically managing power, Auto-Eco Mode helps lower utility bills and promotes eco-friendly operation, making it a standout innovation in Lasko heaters.

User Manuals and Resources

Access official Lasko heater manuals online for detailed instructions, troubleshooting, and maintenance tips. These resources ensure safe and optimal use of your Lasko product.

9.1 Accessing Digital Manuals

Accessing digital manuals for your Lasko heater is straightforward. Visit the official Lasko website or authorized portals to download PDF versions of user guides. These manuals cover installation, operation, and troubleshooting, ensuring you have all the information needed for optimal performance. Digital manuals are available for various Lasko heater models, including popular series like the 6050 and CT32150. They also provide energy-saving tips and maintenance schedules. Download your manual today for easy reference and troubleshooting assistance. This resource is essential for both new and experienced users.

Seasonal Usage and Storage

For seasonal usage, clean and dry your Lasko heater before storing it in a cool, dry place. This prevents damage and ensures optimal performance next season.

10.1 Preparing for Summer Storage

To prepare your Lasko heater for summer storage, ensure it is clean and dry. Unplug the unit and store it in a cool, dry place away from direct sunlight. Cover the heater to protect it from dust and debris. Before storing, check for any dust buildup and clean it thoroughly to prevent damage. Proper storage ensures your heater remains in good condition for future use. Always follow the manufacturer’s guidelines for seasonal storage to maintain optimal performance and longevity.

Accessories and Compatible Products

Enhance your Lasko heater’s functionality with genuine accessories. Remote controls, replacement filters, and compatible stands are available to optimize performance and convenience. Refer to your manual for compatibility.

11.1 Recommended Accessories

To maximize your Lasko heater’s performance, consider these recommended accessories. A remote control offers convenient operation, while replacement filters ensure optimal airflow. Anti-tip brackets enhance safety, and compatible stands improve stability. Additionally, cleaning kits help maintain efficiency by removing dust buildup. For a seamless experience, visit the Lasko website or authorized retailers to explore these accessories, ensuring compatibility with your specific model. These additions will enhance functionality, safety, and longevity of your heater.

Warranty and Customer Support

Lasko heaters come with a limited warranty covering parts and labor for a specified period. For inquiries or claims, contact Lasko’s customer support via phone, email, or their official website. Ensure to register your product for warranty validation and access to exclusive support resources. Visit their online portal for detailed warranty terms, FAQs, and troubleshooting guides tailored to your Lasko heater model.

12.1 Understanding Warranty Terms

Your Lasko heater is backed by a limited warranty that covers manufacturing defects in materials and workmanship. The warranty period typically ranges from one to five years, depending on the model and type of heater. To ensure coverage, register your product within 30 days of purchase. The warranty does not apply to damage caused by misuse, neglect, or improper maintenance. For detailed terms and conditions, refer to the warranty section in your manual or visit Lasko’s official website. Proper product registration is essential for warranty validation.

13.1 Final Tips for Optimal Performance

Regularly clean your Lasko heater to prevent dust buildup and ensure efficient operation. Always unplug the unit before cleaning and follow the manual’s guidelines. Place the heater on a stable, flat surface away from flammable materials. For consistent performance, avoid overloading circuits and use the correct power source. Resetting the heater when it overheats can restore functionality quickly. Refer to the troubleshooting section if issues persist. By following these tips, you’ll extend the lifespan and maintain your heater’s efficiency.

Open post

spring loaded tap guide

A spring loaded tap guide is a tool designed to enhance the accuracy of tapping operations by maintaining proper tap alignment during drilling. It is commonly used in machining and metalworking to ensure precise thread creation, reducing errors and improving overall efficiency.

1.1 Overview of Tap Guides

Tap guides are tools designed to assist in creating threaded holes by guiding taps accurately. They help maintain proper alignment, reducing errors during machining processes. Available in various materials, these guides are essential for precise tapping in both metalworking and woodworking applications. Using a tap guide ensures straight, consistent threads, significantly enhancing the quality and accuracy of the final product.

1.2 Importance of Spring Loaded Mechanism

The spring-loaded mechanism in tap guides plays a crucial role in maintaining proper tap alignment and control during threading operations. It absorbs minor surface irregularities, ensuring consistent and precise taps. This feature significantly reduces the risk of errors and tap breakage, enhancing overall reliability and efficiency in machining processes.

What is a Spring Loaded Tap Guide?

A spring loaded tap guide is a tool that assists in maintaining proper tap alignment during threading operations, ensuring accuracy and reducing errors in machining and metalworking applications.

2.1 Definition and Purpose

A spring loaded tap guide is a specialized tool designed to assist in tapping operations by maintaining proper alignment between the tap and the workpiece. Its primary purpose is to ensure accurate thread creation, reduce errors, and prevent tap breakage. The spring mechanism provides the necessary tension to keep the tap straight, enhancing the efficiency of machining processes. It is typically made of durable materials like hardened steel and is compatible with various tap sizes, making it an essential accessory for both professionals and hobbyists in metalworking and woodworking applications.

2.2 Key Components and Design

A spring loaded tap guide consists of a spring, a bushing, and alignment features. The spring provides adjustable tension to hold the tap in place, while the bushing ensures proper tap alignment. The design often includes a hardened tip for durability and alignment markers for accuracy. Constructed from high-quality materials like steel, it ensures stability and precision during tapping operations, reducing errors and improving efficiency.

Benefits of Using a Spring Loaded Tap Guide

The spring loaded tap guide enhances tapping accuracy, reduces tap breakage risk, and improves stability. It ensures precise alignment and consistent thread quality, boosting overall efficiency.

3.1 Improved Accuracy in Tapping

The spring loaded tap guide significantly enhances tapping accuracy by maintaining proper alignment and reducing wobble. Its design ensures the tap remains straight, promoting precise thread creation. The spring applies consistent pressure, guiding the tap accurately and minimizing deviations. This results in straighter, more precise threads with fewer errors, making it ideal for critical machining and metalworking applications.

3.2 Reduced Risk of Tap Breakage

The spring loaded tap guide reduces the risk of tap breakage by maintaining consistent alignment and preventing excessive pressure or deflection. Its spring mechanism absorbs shocks and ensures steady tapping, minimizing the likelihood of the tap slipping or breaking. This feature is particularly beneficial in demanding machining applications where tap integrity is crucial for achieving precise and durable results.

3.3 Enhanced Stability and Control

The spring loaded tap guide provides enhanced stability and control during tapping operations. Its spring mechanism ensures consistent pressure, keeping the tap aligned and steady. This reduces wobble and vibration, allowing for smoother threading. The improved control minimizes human error, resulting in more precise and professional finishes, especially in intricate or hard-to-reach workpieces.

How to Choose the Right Spring Loaded Tap Guide

Selecting the right spring loaded tap guide involves considering factors like material quality, compatibility with your tools, and design features such as spring tension and alignment accuracy.

4.1 Factors to Consider

When selecting a spring loaded tap guide, consider factors such as material quality, compatibility with your drill press or tooling, spring tension adjustability, and alignment accuracy. Ensure the guide suits your specific tapping needs, whether for precision machining or general use. Durability and ease of calibration are also critical for long-term performance and efficiency in threading operations.

4.2 Material and Build Quality

High-quality materials, such as stainless steel or hardened steel, ensure durability and resistance to wear. Look for a robust frame and precise alignment features. The spring mechanism should be durable, maintaining consistent tension over time. A well-built guide will provide stability and accuracy, making it a reliable tool for precise tapping operations in various applications.

4.3 Compatibility with Your Tools

Ensure the spring loaded tap guide is compatible with your drill press or milling machine. Check the mounting system and shank size to fit your tools. Verify it accommodates various tap sizes and types. Compatibility ensures proper alignment and ease of use, making the tapping process efficient and precise across different machinery and tool setups.

Applications of Spring Loaded Tap Guides

Spring loaded tap guides are essential in machining, metalworking, woodworking, and industrial settings, ensuring precise tapping operations across various materials and applications, enhancing workflow efficiency and accuracy.

5.1 Machining and Metalworking

Spring loaded tap guides are indispensable in machining and metalworking, ensuring precise alignment and reducing errors during tapping operations. They enhance thread quality, improve consistency, and minimize the risk of tap breakage, making them a vital tool for achieving professional-grade results in industrial and precision engineering tasks.

5.2 Woodworking and DIY Projects

Spring loaded tap guides are valuable in woodworking and DIY projects, offering precision and ease for threading applications. They help maintain alignment, reduce errors, and prevent damage to materials. Ideal for hobbyists and professionals alike, these guides enhance accuracy in creating threaded holes for furniture making, repairs, or small-scale projects, ensuring consistent and reliable results.

5.3 Industrial and Automotive Use

Spring loaded tap guides are essential in industrial and automotive applications, ensuring precise thread alignment in high-precision tasks. They are widely used in engine repairs, component manufacturing, and assembly lines to maintain accuracy and durability. The robust design handles heavy-duty operations, reducing tap breakage and enhancing efficiency in demanding environments, making them indispensable for professionals in these fields.

Installation and Setup Guide

Mount the spring loaded tap guide securely, align the tap with the hole, and tighten; Ensure proper alignment and tension for optimal performance during tapping operations.

6.1 Step-by-Step Installation Process

To install a spring-loaded tap guide, start by securing the workpiece firmly on the drill press table. Attach the guide to the drill press spindle, ensuring proper alignment with the hole. Insert the tap into the guide and adjust the spring tension to maintain steady pressure. Finally, test the setup by tapping a small hole to ensure accuracy and proper thread formation.

6.2 Calibration and Adjustment Tips

Calibrate the spring-loaded tap guide by adjusting the spring tension to ensure proper alignment and pressure. Start with minimal tension and gradually increase until the tap stays centered. Periodically check the guide’s alignment and clean debris to maintain accuracy. Use a test hole to verify proper function before tapping critical workpieces, ensuring consistent thread quality and tool longevity.

Maintenance and Care

Regularly clean the spring-loaded tap guide to remove debris and apply a small amount of machine oil for lubrication. Store it in a protective case to prevent damage and ensure optimal performance over time.

7.1 Cleaning and Lubrication

Regular cleaning ensures optimal performance. Use a soft brush to remove debris and compressed air for tight spaces. Inspect for wear or damage. Lightly lubricate moving parts with machine oil to maintain smooth operation and prevent corrosion. Store in a dry, clean environment to avoid rust and contamination, ensuring longevity and reliability.

7.2 Storage and Handling Best Practices

Store your spring loaded tap guide in a cool, dry place to prevent rust. Use a protective case to avoid damage. Handle with care to maintain precision. Keep tools organized for easy access. Avoid exposure to extreme temperatures and direct sunlight. Regularly inspect for wear or damage. Proper storage and handling will extend the tool’s lifespan and ensure optimal performance.

Troubleshooting Common Issues

Address alignment problems by adjusting the guide. If the spring tension is uneven, recalibrate or replace worn components. Regular maintenance prevents operational issues.

8.1 Alignment Problems

Alignment issues with spring loaded tap guides often occur due to uneven surfaces or improper setup. To resolve, ensure the guide is securely fastened and the workpiece is flat. Adjust the guide’s position to maintain parallel alignment with the tap. Clean debris from the guide and tap to ensure smooth operation. Proper alignment is critical to prevent thread misalignment and damage to the tool or workpiece.

8.2 Spring Tension Adjustments

Proper spring tension in a tap guide ensures stable operation and accurate tapping. If the spring is too loose, the tap may wobble, while excessive tension can restrict movement. Adjust the spring by loosening or tightening the adjustment screws. Refer to the manufacturer’s guidelines for optimal tension settings. Incorrect tension can lead to misalignment or uneven thread cutting, so precise adjustment is crucial for reliable performance.

Safety Precautions

Always handle spring loaded tap guides with care to avoid accidents. Wear protective gloves and eyewear when operating. Ensure the tool is securely fastened to prevent unintended movement.

9.1 Safe Handling Practices

Always wear protective gloves and eyewear when handling spring loaded tap guides to prevent injury. Ensure the tool is securely fastened to the machine or workpiece to avoid accidental movement. Regularly inspect the guide for wear or damage. Use proper lifting techniques to prevent strain. Keep loose clothing tied back to avoid entanglement with moving parts.

9.2Avoiding Common Hazards

9.2 Avoiding Common Hazards

Handle spring loaded tap guides with care to avoid injuries from sharp edges or sudden spring tension release. Ensure proper alignment before tapping to prevent tool breakage. Regularly inspect for wear or damage. Avoid over-tightening, as it may cause the guide to slip or malfunction. Keep hands away from moving parts during operation.

10.1 Summary of Key Points

Spring loaded tap guides are essential tools for precise tapping operations, ensuring alignment and reducing tap breakage. They enhance accuracy, stability, and control, making them ideal for machining, woodworking, and industrial applications. Proper selection, installation, and maintenance are crucial for optimal performance. Regular calibration and care extend their lifespan, ensuring consistent results across various projects and materials.

10.2 Final Thoughts and Recommendations

Spring loaded tap guides are invaluable for ensuring precision and durability in tapping tasks. For optimal performance, select guides made from high-quality materials and ensure compatibility with your tools. Regular maintenance, including cleaning and lubrication, will extend their lifespan. Invest in a reliable spring loaded tap guide to elevate your machining, woodworking, or industrial projects, achieving professional-grade results consistently.

Open post

mitsubishi d700 instruction manual

1.1 Overview of the Mitsubishi D700 Series

The Mitsubishi D700 series is a high-performance inverter designed for industrial motor control, offering precise speed regulation and energy efficiency. It supports three-phase induction motors, providing a power range from 0.1 to 7.5 kW. Equipped with advanced features like the safety stop function, it ensures reliable operation and compliance with international safety standards. This inverter is ideal for various industrial applications, delivering exceptional control and durability.

The Mitsubishi D700 series is a compact, high-efficiency inverter designed for motor speed control in industrial applications. It offers advanced features like dual safety channels, parameter settings, and a user-friendly interface. Ideal for three-phase induction motors, it ensures precise control, energy savings, and reliability. Suitable for various industries, it supports power ranges from 0.1 to 7.5 kW.

1.2 Importance of the Instruction Manual

The instruction manual is crucial for the safe and effective operation of the Mitsubishi D700 series. It provides detailed guidance on installation, wiring, programming, and troubleshooting, ensuring optimal performance. Understanding the manual prevents potential risks and maximizes the inverter’s functionality. Always refer to it before and during operation for reliable and efficient motor control.

Key Features and Benefits

The Mitsubishi D700 series offers advanced speed control, high efficiency, and robust safety features like the safety stop function. Its compact design, wide power range, and compatibility with various motors ensure versatility and reliable performance in industrial applications, making it a top choice for precise motor control and energy savings.

2.1 Main Features of the Mitsubishi D700

The Mitsubishi D700 series features a wide power range (0.1-7.5 kW), supporting three-phase induction motors. It includes advanced safety functions like dual safety channels for secure operation, as well as user-friendly interfaces for easy parameter configuration. The inverter also offers high-efficiency motor control, compact design, and compatibility with various industrial automation systems, ensuring reliable performance across applications.

2.2 Benefits of Using the Mitsubishi D700

The Mitsubishi D700 offers enhanced energy efficiency, reducing operational costs. Its compact design saves space, while advanced safety features ensure reliable operation. It improves productivity with precise motor control and supports seamless integration with industrial systems. The inverter’s durability and high performance make it a versatile solution for various applications, ensuring long-term reliability and efficiency.

Safety Precautions

Ensure proper installation, operation, and maintenance to prevent accidents. Always follow the manual’s guidelines for safe handling and adherence to safety standards for reliable performance.

3.1 General Safety Instructions

Always follow general safety instructions for handling electrical equipment. Ensure proper grounding, avoid overloading circuits, and keep the inverter away from flammable materials. Proper installation in a well-ventilated area is essential to prevent overheating. Never operate the inverter in hazardous environments or near water. Adhere to all safety guidelines to ensure safe and reliable operation of the Mitsubishi D700 series inverter.

3.2 Installation and Handling Guidelines

Ensure proper grounding of the inverter to prevent electrical hazards. Mount the unit in a well-ventilated area, avoiding direct sunlight and moisture. Handle the inverter with care to avoid physical damage. Follow installation instructions carefully, ensuring all connections are secure and correctly rated for the application. Proper installation is crucial for safe and reliable operation of the Mitsubishi D700 series inverter.

3.3 Safety Stop Function

The Mitsubishi D700 series features a safety stop function that prevents the inverter from supplying rotational energy to the motor. Dual safety channels (S1 and S2) cut off the gate-drive power to the IGBT, ensuring the motor stops safely. Proper setup and testing of this function are essential to guarantee operator safety and prevent unexpected motor movement.

3.4 Emergency Procedures

In case of an emergency, such as a power failure or motor malfunction, immediately disconnect the power supply and activate the safety stop function. Ensure all personnel are clear of moving parts. Contact Mitsubishi Electric support for assistance and refer to the manual for specific recovery procedures. Always prioritize safety and follow proper shutdown protocols.

Installation and Wiring

Proper installation and wiring are crucial for safe and efficient operation. Ensure the inverter is correctly grounded and wired to prevent electrical noise. Refer to the manual for detailed specifications and guidelines to avoid potential hazards and ensure compliance with safety standards.

4.1 Pre-Installation Checks

Before installing the Mitsubishi D700, ensure the power supply matches the inverter’s specifications. Verify the environment meets operating conditions, such as temperature and humidity. Check for any damage or missing components. Confirm motor compatibility and review safety guidelines to ensure a safe and proper setup. Always refer to the manual for detailed pre-installation requirements.

4.2 Wiring Guidelines and Recommendations

Ensure proper wiring by following the manual’s diagrams and instructions. Use appropriately sized cables for power and control connections. Ground the inverter correctly to prevent noise and ensure safety. Avoid crossing power and control cables to minimize interference. Double-check all connections for tightness and correctness before powering up. Refer to the manual for specific wiring recommendations and safety precautions.

4.3 Initial Setup and Configuration

Begin by powering up the inverter and initializing the parameter settings using the operation panel. Set basic parameters such as motor specifications and control modes. Use the Parameter Unit (FR-PU07) for advanced configurations if required. Ensure all settings align with the connected motor and application requirements. Refer to the manual for detailed step-by-step instructions and safety guidelines during setup.

Programming and Configuration

Configure the Mitsubishi D700 by setting basic and advanced parameters using the operation panel or Parameter Unit (FR-PU07). Adjust motor settings, control modes, and safety features to optimize performance for specific applications. Refer to the instruction manual for detailed guidance on programming and configuration procedures.

5.1 Basic Parameter Settings

Set basic parameters such as motor frequency, voltage, and speed using the operation panel or Parameter Unit (FR-PU07). These settings ensure proper motor control and efficiency. Adjust parameters like acceleration/deceleration time, torque, and motor rpm to match your application needs. Refer to the instruction manual for guidance on configuring these fundamental settings correctly.

5.2 Advanced Parameter Configuration

Configure advanced parameters such as torque boost, slip compensation, and custom I/O settings for precise motor control. Adjust these settings to optimize performance for specific applications. Ensure changes align with motor characteristics and system requirements. Refer to the instruction manual for detailed guidance on advanced configurations to avoid operational issues.

5.3 Using the Operation Panel

Use the operation panel to monitor and control the inverter’s functions. Adjust parameters, monitor operational status, and access advanced settings. The panel features a user-friendly interface with navigation keys and a display for real-time data. Ensure proper operation by following the manual’s guidelines for button functions and configuration steps.

5.4 Parameter Unit (FR-PU07) Operations

The FR-PU07 parameter unit enables advanced configuration and monitoring of the Mitsubishi D700 inverter. Use the display and navigation keys to set and verify parameters. The POWER lamp indicates when the unit is operational. Refer to the instruction manual for detailed steps on parameter adjustment and troubleshooting to ensure optimal performance and safety.

Operating the Inverter

Operating the Mitsubishi D700 inverter involves starting the motor, monitoring its operation, and utilizing various control modes and functions for optimal performance and safety.

6.1 Starting the Motor

To start the motor using the Mitsubishi D700 inverter, ensure the power is switched on and the control mode is set to external operation. Review the parameter settings to confirm they match the motor specifications. Press the start button on the operation panel or send a start signal from an external control device. The inverter will initialize and begin driving the motor. Always consult the manual for specific startup procedures and troubleshooting.

6.2 Monitoring Inverter Operation

Monitor the Mitsubishi D700 inverter operation using the LCD display, which shows real-time data such as motor speed, output frequency, and current; Check the status LEDs for operational and fault indicators. Use the parameter unit or external communication modules for remote monitoring. Regularly review the operation panel to ensure smooth performance and address any anomalies promptly.

6.3 Control Modes and Functions

The Mitsubishi D700 offers multiple control modes, including V/F control, vector control, and torque control, catering to various industrial applications. Key functions include multi-speed operation, speed search, and external control via communication modules. These features enable precise motor control, adaptability to different loads, and seamless integration with industrial automation systems for enhanced performance and efficiency.

Maintenance and Troubleshooting

Regular maintenance ensures optimal performance and longevity of the Mitsubishi D700. Routine checks include cleaning, verifying connections, and ensuring proper ventilation. Troubleshooting involves identifying error codes, addressing common issues like overheating, and using diagnostic tools for quick resolution.

7.1 Routine Maintenance Checks

Regular maintenance is crucial for the Mitsubishi D700’s performance and longevity. Clean the inverter, check terminal connections for tightness, and ensure proper ventilation. Verify the cooling system, including fans and heat sinks, for optimal operation. Follow the recommended maintenance schedule and address any error codes promptly to prevent unexpected faults and ensure reliable functionality.

7.2 Common Issues and Solutions

Troubleshooting the Mitsubishi D700 involves addressing common issues promptly.

  • Overheating: Ensure proper ventilation and clean the inverter regularly.
  • Motor speed fluctuations: Check parameter settings and power supply stability.

Refer to the instruction manual for detailed diagnostics and solutions to maintain optimal performance.

7.3 Error Codes and Diagnostics

The Mitsubishi D700 inverter displays error codes to indicate specific issues. Common codes include E01 (overcurrent), E02 (overload), and E03 (communication error). Refer to the instruction manual for detailed explanations and solutions. Ensure proper wiring and load conditions to resolve these issues promptly, maintaining optimal performance and safety.

Technical Specifications

The Mitsubishi D700 series inverters offer a power range of 0.1 to 7.5 kW, supporting three-phase induction motors. Operating conditions include temperatures from -10°C to +50°C and humidity up to 90%. Compliance with international standards ensures reliable performance and safety;

8.1 Power Range and Motor Compatibility

The Mitsubishi D700 series inverters are designed to operate with three-phase induction motors, offering a power range from 0.1 kW to 7.5 kW. This versatility enables compatibility with a wide variety of motor sizes and industrial applications, ensuring optimal performance across different load conditions. The inverter supports both standard and customized motor configurations, making it adaptable to diverse operational needs while maintaining high efficiency and reliability.

8.2 Environmental and Operating Conditions

The Mitsubishi D700 series inverters are designed to operate in environments with temperatures ranging from 0°C to 50°C and humidity levels up to 90% (non-condensing). Proper installation, including grounding, is essential to ensure safe and reliable operation. The inverters are suitable for standard industrial environments and must be protected from direct exposure to water, dust, or corrosive substances for optimal performance;

8.3 Compliance with International Standards

The Mitsubishi D700 series inverters are designed to meet international standards, including CE, UL, and IEC regulations. They comply with safety, EMC, and environmental requirements, ensuring reliable performance in global industrial applications. Compliance with these standards guarantees adherence to strict quality and safety guidelines, making the D700 series a trusted choice for diverse operational needs worldwide.

Advanced Functions

The Mitsubishi D700 series offers advanced functions like speed search, multi-speed operation, and remote control capabilities, enhancing motor control precision and operational flexibility for industrial applications.

9.1 Speed Search Function

The Speed Search Function in the Mitsubishi D700 series allows the inverter to automatically detect and adjust to the motor’s optimal operating speed, ensuring precise control and efficiency. This feature is particularly useful in applications requiring consistent performance under varying load conditions. It minimizes downtime and enhances operational reliability by dynamically adapting to motor characteristics.

9.2 Multi-Speed Operation

The Mitsubishi D700 series supports multi-speed operation, enabling the inverter to run motors at multiple preset speeds. This feature enhances operational flexibility and efficiency, particularly in applications requiring consistent performance across varying speed demands. Users can easily program and adjust these speeds using the operation panel or parameter unit, ensuring precise control and adaptability in diverse industrial scenarios.

9.3 Remote Control and Communication

The Mitsubishi D700 series offers remote control and communication capabilities, enabling seamless integration with external devices such as PLCs and HMIs. It supports standard communication protocols like Modbus RTU and RS-485, allowing for efficient monitoring and control. This feature enhances operational flexibility and simplifies system integration, ensuring reliable performance in industrial automation environments.

Compatibility and Integration

The Mitsubishi D700 series is compatible with various industrial motors and systems, ensuring seamless integration with automation setups and communication modules for enhanced operational efficiency.

10.1 Compatible Motors and Systems

The Mitsubishi D700 series is designed to work seamlessly with three-phase induction motors and various industrial automation systems. It supports motors ranging from 0.1 to 7.5 kW, ensuring optimal performance across different applications. Compatibility extends to Mitsubishi’s own control systems, enabling efficient integration and operation within industrial setups, enhancing productivity and system reliability significantly.

10.2 Communication Modules and Options

The Mitsubishi D700 series offers versatile communication modules, including RS485 and Ethernet options, enabling seamless integration with industrial networks. These modules support various protocols such as Modbus RTU and TCP/IP, facilitating remote monitoring and control. They enhance connectivity and compatibility with programmable logic controllers (PLCs) and other industrial automation systems effectively.

10.3 Integration with Industrial Automation Systems

The Mitsubishi D700 seamlessly integrates with industrial automation systems, supporting communication protocols like Modbus RTU and TCP/IP. It connects effortlessly with programmable logic controllers (PLCs) and other devices, ensuring centralized control and monitoring. This scalability allows the D700 to adapt to various industrial environments, ensuring smooth interaction with existing systems for enhanced productivity and efficiency.

Warranty and Support

The Mitsubishi D700 is backed by a comprehensive warranty and dedicated customer support. Contact Mitsubishi Electric for service options, ensuring optimal performance and longevity of your inverter.

11.1 Warranty Conditions and Coverage

The Mitsubishi D700 series inverters are covered by a limited warranty, typically valid for one year from the date of purchase. The warranty covers defects in materials and workmanship under normal use and conditions. For detailed terms, refer to the official manual or contact Mitsubishi Electric support for specific coverage details and regional variations.

11.2 Customer Support and Service Options

Mitsubishi Electric offers comprehensive customer support for the D700 series. Users can contact their local sales representative, the nearest FA Center, or the dealer where the inverter was purchased. Additionally, online resources, including manuals and technical guides, are available for download, ensuring timely assistance and troubleshooting for optimal product performance and longevity.

11.3 Online Resources and Documentation

Mitsubishi Electric provides extensive online resources for the D700 series. Users can access instruction manuals, technical guides, and safety stop function instructions on the official website. The “Download” section offers PDF manuals, ensuring easy access to essential documentation. These resources are designed to support troubleshooting, maintenance, and optimal use of the inverter.

12.2 Final Tips for Effective Use

This comprehensive guide covers features, safety, installation, and maintenance of the Mitsubishi D700. Proper use ensures optimal performance and troubleshooting. Mitsubishi’s commitment to quality and innovation shines through.

Open post

mighty mule instruction manual

Welcome to the world of possibilities with your new Mighty Mule Gate Opener Manual! This guide explores its creative potential while emphasizing safety and proper installation.

1.1 Overview of the Mighty Mule Gate Opener

The Mighty Mule Gate Opener is a versatile solution for automatic gate operation, designed for single leaf gates and compatible with various materials like vinyl, aluminum, and wrought iron. It ensures smooth, efficient, and secure gate control; This manual provides detailed guidance on installation, operation, and maintenance to maximize performance and longevity, ensuring safe and reliable functionality for years to come.

1.2 Importance of the Instruction Manual

The instruction manual is essential for understanding the Mighty Mule Gate Opener’s features, installation, and maintenance. It provides critical safety information, troubleshooting tips, and warranty details. Reading it carefully ensures proper setup, optimal performance, and compliance with safety standards. This guide is your key to maximizing the product’s lifespan and functionality while minimizing potential risks or errors during operation.

Safety Precautions and Guidelines

Ensure safe installation and operation by following all safety materials and warnings provided. Regular testing and proper maintenance are crucial for optimal functionality and user protection.

2.1 General Safety Tips

Always read the instruction manual carefully before installation. Conduct regular tests on the gate opener to ensure smooth operation. Avoid modifying the system without professional guidance. Keep children and pets away during installation and operation. Never override safety features, and ensure all users understand proper functionality. Regular maintenance is essential to prevent accidents and extend lifespan. Follow all provided safety materials and warnings diligently.

2.2 Safety Materials and Warnings

The Mighty Mule Gate Opener comes with essential safety materials to ensure proper and secure usage. These include detailed warnings, certification standards like ISO, ATEX, and CE, and compliance with safety regulations. Always read and adhere to these guidelines to prevent potential hazards. Failure to follow instructions may result in system malfunctions or safety risks. Prioritize these warnings for optimal performance and user protection.

System Components and Tools Needed

The Mighty Mule Gate Opener package includes essential components like control boards, gate arms, and remote controls. Additional tools such as drills, screwdrivers, and wrenches are required for installation.

3.1 List of Components in the Box

The Mighty Mule Gate Opener package includes a control board, gate arms, remote controls, and mounting hardware. Additional components such as safety sensors and wiring are also provided. Ensure all items are accounted for before starting installation. Refer to the manual for a detailed inventory and descriptions of each part.

3.2 Tools Required for Installation

To install your Mighty Mule Gate Opener, you will need a drill, screwdrivers (both Phillips and flathead), wrenches, pliers, and a measuring tape. Safety gloves and goggles are recommended for protection. Ensure all tools are readily available before starting the installation process. Refer to the manual for any specific tool requirements to ensure a smooth process.

Installation Instructions

Start by preparing your gate and following the manual’s step-by-step guide. Ensure safety, proper alignment, and secure mounting. Follow instructions carefully for optimal performance and longevity.

4.1 Preparing the Gate for Installation

Ensure your gate is compatible with the Mighty Mule system. Check weight and size limits, clean the area, and confirm proper alignment. Remove obstacles and ensure the gate is structurally sound. For optimal performance, refer to the manual for specific gate type requirements, such as vinyl, aluminum, or wrought iron compatibility. Prepare any optional accessories like solar panels if needed.

4.2 Step-by-Step Installation Process

Begin by unpacking and organizing all components. Attach the control box and motor to the gate frame, ensuring proper alignment. Connect the wiring according to the manual, and install sensors for safety. Test the opener to ensure smooth operation. Secure all bolts and check for proper gate balance. Refer to the manual for detailed instructions and troubleshooting tips.

Operating the Mighty Mule Gate Opener

The Mighty Mule Gate Opener operates smoothly with remote controls or keyless entry, ensuring convenient access. Sensors detect obstacles, enhancing safety. Regular testing ensures reliability.

5.1 Understanding Basic Operations

Understanding basic operations ensures smooth functionality. The Mighty Mule Gate Opener operates via remote controls or keyless entry, offering convenience and security. Sensors detect obstacles, preventing accidents. Regular testing of the opener is essential for reliable performance. Always refer to the manual for detailed instructions on daily operations and safety protocols.

5.2 Using Remote Controls and Keyless Entry

Remote controls and keyless entry offer convenient access to your gate. Program the remote by following the manual’s instructions. Keyless entry enhances security, allowing pin-based access. Test devices regularly to ensure proper function. Always store remotes and pin details securely. Refer to the manual for troubleshooting tips if issues arise with remote or keyless operations.

Troubleshooting Common Issues

Identify and resolve common issues with your Mighty Mule Gate Opener. Check power sources, sensor alignment, and wiring connections. Refer to the manual for detailed troubleshooting steps to ensure proper functionality and address any operational problems effectively.

6.1 Diagnosing Common Problems

Start by identifying the issue: check power sources, sensor alignment, and wiring connections. Common problems include gate misalignment, faulty sensors, or power outages. Consult the manual for specific diagnostic steps. Ensure all components are functioning correctly and perform monthly tests to maintain optimal performance. Addressing issues promptly prevents further complications and ensures smooth operation.

6.2 Resetting and Emergency Release Procedures

To reset your Mighty Mule Gate Opener, first ensure the gate is in the fully closed position. Locate the emergency release pin, pull it to disengage the motor, and manually operate the gate. After resolving the issue, re-engage the motor and test functionality. Always follow the manual’s specific instructions for resetting and emergency procedures to ensure safety and proper operation.

Maintenance and Upkeep

Regular maintenance ensures optimal performance and longevity of your Mighty Mule Gate Opener. Test the opener monthly, check sensors, and clean or replace worn components as needed. Always refer to the manual for specific guidance on upkeep and repairs to maintain safe and reliable operation.

7.1 Regular Maintenance Tips

Regular maintenance is crucial for ensuring the longevity and smooth operation of your Mighty Mule Gate Opener. Test the opener monthly to ensure proper function. Clean dirt, debris, and rust from components. Lubricate moving parts and inspect wires for damage. Replace worn or damaged parts promptly. Always refer to the manual for specific guidance on maintenance procedures to keep your gate opener in optimal condition.

7.2 Extending the Lifespan of the Gate Opener

To extend the lifespan of your Mighty Mule Gate Opener, ensure proper lubrication of moving parts and inspect for wear regularly. Keep the gate aligned and balanced to avoid unnecessary strain. Protect the opener from extreme weather conditions and clean debris periodically. Follow the manual’s guidelines for maintenance and replace parts as needed to ensure optimal performance and durability over time.

Additional Features and Accessories

Optional Accessories: Enhance your Mighty Mule Gate Opener with solar panels, wireless keyless entry systems, and compatible smart technology for improved functionality and convenience.

8.1 Optional Accessories for Enhanced Functionality

Enhance your Mighty Mule Gate Opener with optional accessories like solar panels for eco-friendly power, wireless keyless entry systems for convenient access, and smart technology integration for remote control via apps. These additions improve functionality, ensuring seamless operation and modern convenience.

  • Solar panels for sustainable energy solutions.
  • Wireless keyless entry for easy access.
  • Smart technology for app-based control.

8.2 Integrating Smart Technology with the Gate Opener

Integrate your Mighty Mule Gate Opener with smart technology for advanced control. Use the Mighty Mule app to manage your gate remotely, receive notifications, and monitor activity. Compatible with voice assistants like Alexa and Google Home, this integration offers seamless smart home functionality, enhancing convenience and security.

  • Remote access via the Mighty Mule app.
  • Real-time notifications for gate activity.
  • Voice control with smart assistants.

Warranty and Support Information

Your Mighty Mule Gate Opener is backed by a comprehensive warranty. For details, contact Mighty Mule customer service or visit their official website for support resources.

9.1 Understanding the Warranty Terms

The Mighty Mule Gate Opener is covered by a comprehensive warranty. Typically, this includes a specific coverage period for parts and labor. Warranty terms vary by model, and registration may be required for validation. The warranty generally covers manufacturing defects but excludes damage from misuse or normal wear and tear. For detailed terms and conditions, refer to the official manual or contact Mighty Mule support.

9.2 Contacting Customer Support

For assistance with your Mighty Mule Gate Opener, contact customer support via phone or visit their official website. The support team is available to address warranty claims, troubleshooting, and installation inquiries. Additional resources, including manuals and guides, can be found online to help resolve issues promptly and efficiently.

Thank you for using the Mighty Mule Gate Opener. Proper installation and regular maintenance ensure optimal performance. Always refer to this manual for troubleshooting and safety guidelines.

10.1 Summary of Key Points

This manual covered essential topics like safety, installation, operation, and maintenance for your Mighty Mule Gate Opener. Regular maintenance ensures longevity, while troubleshooting guides help resolve common issues. Always follow safety precautions and refer to the manual for detailed instructions. Proper usage and adherence to guidelines will enhance performance and user experience for years to come.

10.2 Encouragement for Proper Usage

By following the guidelines in this manual, you’ll ensure optimal performance, safety, and durability of your Mighty Mule Gate Opener. Proper installation, regular maintenance, and adherence to safety protocols will enhance your user experience. Embrace these practices to enjoy reliable and smooth operation for years to come, maximizing the value of your investment.

Resources and Downloads

Visit the official Mighty Mule website for comprehensive manuals, guides, and downloadable resources. Access PDF instructions for models like MM360, MM371W, and MM372W, ensuring proper setup and maintenance.

11.1 Accessing the Full Instruction Manual Online

Access the full Mighty Mule instruction manual online in downloadable PDF format. Visit the official Mighty Mule website and navigate to the support section. Enter your model number, such as MM360 or MM371W, to find the corresponding guide. This resource ensures you have comprehensive instructions for installation, operation, and troubleshooting. Downloading is free and straightforward, providing everything needed for optimal performance.

11.2 Additional Tutorials and Guides

Enhance your experience with the Mighty Mule Gate Opener by exploring additional tutorials and guides. Video tutorials provide step-by-step installation and troubleshooting tips, while detailed PDF guides cover advanced features. Visit the Mighty Mule website for model-specific resources, such as MM360 or MM371W, ensuring optimal performance and addressing specific needs. These resources are designed to maximize functionality and user satisfaction.

Compliance and Certifications

The Mighty Mule Gate Opener adheres to ISO, ATEX, CE, and CUTR standards, ensuring compliance with global safety regulations and industry certifications for reliable performance and user trust.

12.1 Industry Standards and Certifications

The Mighty Mule Gate Opener complies with ISO, ATEX, CE, and CUTR standards, ensuring adherence to international safety and performance benchmarks. These certifications guarantee the product meets rigorous requirements for reliability, security, and environmental sustainability, making it a trusted choice for residential and commercial gate automation systems worldwide.

12.2 Compliance with Safety Regulations

The Mighty Mule Gate Opener adheres to strict safety regulations, ensuring secure and reliable operation. It meets industry standards for automated gate systems, including proper installation and regular testing. Users must follow all safety guidelines in the manual to ensure compliance and prevent accidents, guaranteeing safe and efficient functionality for years to come.

Contact Information and Support Channels

For assistance, visit www.mightymule.com or contact customer service at 1-800-803-5693. Email support and online resources are also available for troubleshooting and inquiries.

13.1 Mighty Mule Customer Service Contact Details

For assistance, contact Mighty Mule customer service at 1-800-803-5693. Visit their official website at www.mightymule.com for support resources. Email inquiries can be directed to their support team. Office hours are Monday–Friday, 8 AM–6 PM EST. Replacement manuals and troubleshooting guides are also available online for convenient access.

13.2 Online Support and Community Resources

Visit www.mightymule.com for comprehensive online support, including downloadable manuals, troubleshooting guides, and FAQs. The Mighty Mule Help Center offers detailed resources for installation, maintenance, and repair. Engage with the community forum for tips and advice from experienced users. Additional tutorials and guides are available to ensure optimal performance and longevity of your gate opener.

Open post

ds160 bosch manual

The Bosch DS160 is a high-performance passive infrared (PIR) detector designed for Request-to-Exit (REX) applications, ensuring reliable access control in interior settings with advanced features and UL compliance.

1.1 Overview of the Bosch DS160 Detector

The Bosch DS160 is a passive-infrared (PIR) detector designed for Request-to-Exit (REX) applications, offering reliable access control in interior settings. It features a compact design for versatile installations and adjustable coverage patterns to suit various environments. The detector operates in temperatures ranging from -29°C to 49°C and requires a voltage of 12 to 30 VDC. With UL Listing and compliance with ULC-S319 standards, it ensures safety and reliability. The DS160 also includes advanced features like remote entry functionality and Motion Analyzer II signal processing to minimize false activations, making it a robust solution for access control systems.

1.2 Purpose and Applications of the DS160

The Bosch DS160 is specifically designed for Request-to-Exit (REX) applications, enabling secure and efficient access control in interior settings. Its primary function is to detect motion and signal exit requests, making it ideal for installations in offices, hospitals, and industrial facilities. The detector’s compact design and adjustable coverage patterns allow it to adapt to various environments, ensuring accurate detection while minimizing false alarms. It is commonly used in door control systems to manage exit requests reliably. The DS160’s remote entry functionality further enhances its versatility, making it a key component in modern access control solutions. Its design ensures seamless integration into existing security systems.

Key Features and Benefits

The Bosch DS160 features Motion Analyzer II for reduced false alarms, remote entry functionality, and UL compliance, ensuring reliable and efficient access control solutions.

2.1 Technical Specifications of the DS160

The Bosch DS160 operates on 12-30 VDC, consuming 8-39 mA, with a temperature range of -29°C to 49°C. It features Motion Analyzer II for reduced false alarms and includes Form C relay outputs. The detector offers adjustable coverage patterns and is UL Listed under UL 294 for access control. Its compact design allows versatile installation in various settings, ensuring reliable performance in request-to-exit applications. The DS160 is designed for interior use, providing efficient and durable access control solutions. Its specifications ensure compatibility with UL-approved systems, making it a trusted choice for security installations.

2.2 Motion Analyzer II Signal Processing

The Bosch DS160 incorporates Motion Analyzer II, an advanced signal processing technology designed to minimize false alarms. This system intelligently differentiates between human movement and environmental factors, such as ceiling fans or hanging objects, to ensure accurate detection. By analyzing infrared signals dynamically, it enhances reliability in various lighting and temperature conditions. The Motion Analyzer II also supports adjustable sensitivity settings, allowing customization to suit specific installation environments. This feature ensures the DS160 delivers consistent performance, reducing unnecessary triggers while maintaining high detection accuracy for request-to-exit applications. Its robust algorithm makes it a reliable choice for secure access control systems.

2.3 Remote Entry Functionality

The Bosch DS160 features a remote entry functionality, enabling seamless integration with access control systems. This feature is controlled by DIP switches 2, 9, and 10, which determine the detector’s response when a connected contact closes. When activated, the DS160 disables its detection capability for a 10-second period, allowing authorized individuals to exit without triggering an alarm. This functionality enhances flexibility in access control applications, ensuring smooth operation in various settings. The remote entry feature is essential for systems requiring timed or controlled access, making the DS160 a versatile solution for modern security needs. Its reliability ensures consistent performance in high-demand environments.

Installation and Wiring Guidelines

The Bosch DS160 can be mounted on walls or ceilings, offering flexible installation options. Its coverage area can be adjusted and masked to suit specific needs. Proper wiring ensures optimal performance and reliability in access control systems.

3.1 Mounting Options: Wall or Ceiling Installation

The Bosch DS160 offers versatile mounting options, allowing installation on either walls or ceilings to suit various application needs. Wall mounting is ideal for detecting motion near doors or exits, while ceiling installation provides broader coverage in open areas. The detector comes with hardware for both installation methods, ensuring secure and stable placement. Adjustments can be made to the sensor’s orientation to optimize coverage patterns. This flexibility ensures the DS160 can be tailored to specific environments, enhancing its effectiveness in access control systems. Proper installation ensures reliable performance and adherence to safety standards.

3.2 Wiring Instructions for the DS160

The Bosch DS160 requires careful wiring to ensure proper functionality. It operates on a 12-30 VDC power supply, with connections for positive and negative terminals. The detector includes terminals for request-to-exit (REX) functionality, door contact inputs, and optional tamper switch integration. Wiring should be secured to prevent interference and ensure reliable performance. Proper grounding is essential to avoid false activations and maintain system integrity. Installers must follow the provided wiring diagrams and guidelines to configure the device correctly. Adhering to these instructions ensures the DS160 operates efficiently and meets safety standards. Always refer to the manual for detailed wiring specifications.

3.3 Coverage Patterns and Adjustment

The Bosch DS160 offers a wide coverage area of up to 98.4 feet, making it suitable for various interior settings. Its detection pattern can be adjusted to meet specific installation needs, allowing for precise control over the monitored space. The detector can be mounted on walls or ceilings and features an adjustable lens for customizing coverage. Additionally, masking tape can be applied to the lens to block specific areas from detection, ensuring accurate and reliable performance. Proper adjustment ensures minimal false activations and optimal security. Always refer to the manual for detailed guidance on aligning and fine-tuning the coverage pattern for desired results.

Compliance and Certifications

The Bosch DS160 is UL Listed under standard UL 294 for access control devices and certified to ULC-S319 for Canada, ensuring compliance with industry standards.

4.1 UL Listing and Compliance

The Bosch DS160 is UL Listed under standard UL 294 for access control devices, confirming it meets rigorous safety and performance standards. This certification ensures the detector’s reliability and effectiveness in access control systems, making it suitable for various environments. The UL mark signifies that the DS160 has undergone comprehensive testing, evaluating its components and performance under diverse conditions. This compliance is essential for ensuring consistent and safe operation, which is critical in security applications. By adhering to UL standards, the DS160 demonstrates Bosch’s commitment to quality and reliability in access control solutions. This certification is a testament to its durability and effectiveness in real-world scenarios.

4.2 ULC-S319 Certification for Canada

The Bosch DS160 is certified under the ULC-S319 standard for Canada, ensuring compliance with Canadian safety and performance requirements for access control devices. This certification is essential for installations in Canadian markets, as it verifies the detector’s reliability and effectiveness in access control systems. The ULC-S319 standard evaluates the device’s ability to operate accurately under various conditions, ensuring it meets strict Canadian regulations. By obtaining this certification, the DS160 demonstrates its suitability for diverse environments in Canada, providing users with confidence in its performance and adherence to local standards. This certification underscores Bosch’s commitment to meeting regional compliance requirements.

Troubleshooting Common Issues

The Bosch DS160 may experience false activations or connectivity issues. Check wiring connections, adjust coverage settings, and ensure proper installation to resolve these common problems effectively.

5.1 Diagnosing False Activation Causes

False activations in the Bosch DS160 can occur due to environmental factors such as air movement, temperature fluctuations, or vibrations. The Motion Analyzer II signal processing helps minimize these issues, but improper installation or wiring may still cause false triggers. Check for sources of interference, such as ceiling fans or nearby electronics, and ensure the detector is mounted correctly. Adjust the sensitivity settings if necessary. Verify that all wiring connections are secure and free from damage. Regular maintenance, such as cleaning the lens, can also prevent false activations. Refer to the manual for detailed troubleshooting steps and solutions.

5.2 Resolving Connectivity Problems

Connectivity issues with the Bosch DS160 can often be resolved by verifying wiring connections. Ensure that all terminals, including R, C, and the NO/NC contacts, are securely connected. Check the power supply to confirm it meets the required 12-30 VDC range. If the detector fails to activate, inspect for loose or damaged wires. Additionally, ensure that the detector is properly grounded to prevent interference. If problems persist, review the wiring diagram in the installation manual or consult technical support for further assistance. Proper connectivity is crucial for reliable operation of the DS160 in access control systems.

Remote Entry Function

The DS160’s remote entry function uses DIP switches 2, 9, and 10 to configure its response when a connected contact closes, ensuring seamless access control with a 10-second delay.

6.1 Configuring the Remote Entry Feature

The remote entry feature on the Bosch DS160 is configured using DIP switches 2, 9, and 10. These switches determine the detector’s response when a connected contact closes, enabling or disabling its functionality. To configure, open the detector and locate the DIP switches. Set switches 2, 9, and 10 according to the desired remote entry behavior. For example, DIP switch 2 controls the disable timer, while switches 9 and 10 manage the logic for remote entry activation. After configuring, close the detector and test the remote entry function to ensure proper operation. Always consult the manual for specific switch configurations.

Differences Between DS160 and DS161

The Bosch DS160 and DS161 differ primarily in color, with the DS160 being light gray and the DS161 black. Both are UL-listed PIR detectors for REX applications.

7.1 Color Variants and Functional Differences

The Bosch DS160 and DS161 differ primarily in their color variants, with the DS160 being light gray and the DS161 black. Both are high-performance PIR detectors designed for Request-to-Exit (REX) applications. Functionally, they share identical features, including advanced Motion Analyzer II signal processing, remote entry capabilities, and UL compliance. The detectors are compact, versatile, and suitable for various interior installations. While the color variation may influence aesthetic preferences, it does not affect performance or application suitability. Both models are part of the same series, ensuring consistent reliability and functionality across different settings.

Maintenance and Upkeep

Regular cleaning of the Bosch DS160 detector is essential for optimal performance. Use a soft cloth to wipe the lens and housing to prevent dust buildup and ensure reliability.

8.1 Cleaning and Servicing the Detector

Regular maintenance is crucial for the Bosch DS160 detector to ensure optimal performance. Clean the lens and housing with a soft cloth to remove dust and debris, which can impair detection accuracy. Avoid using harsh chemicals or abrasive materials that might damage the sensor. Inspect the detector periodically for any obstructions or tampering. Ensure the mounting hardware is secure and properly aligned. Servicing should also include checking the wiring connections for integrity and stability. Proper upkeep prevents false activations and guarantees reliable operation in access control systems. Follow the manufacturer’s guidelines for servicing intervals to maintain UL compliance and system efficiency.

The Bosch DS160 detector is a reliable and advanced solution for Request-to-Exit (REX) applications, offering high performance and durability. Its design ensures accurate motion detection while minimizing false activations. With UL compliance and versatile installation options, the DS160 is ideal for various access control systems. Proper installation, wiring, and maintenance are essential to optimize its functionality. By following the guidelines outlined in this manual, users can ensure the detector operates efficiently, providing consistent security and access control. Regular servicing and adherence to manufacturer recommendations will extend the lifespan of the device, ensuring long-term reliability and effectiveness in its intended applications.

Open post

superfood guide lwspeakcare

Superfoods are nutrient-dense foods packed with vitamins, minerals, and antioxidants, offering exceptional health benefits. They support overall health, energy, and well-being, making them a cornerstone of a balanced diet and holistic wellness.

What Are Superfoods?

Superfoods are nutrient-dense foods rich in vitamins, minerals, antioxidants, and other beneficial compounds. They are often associated with promoting health, boosting energy, and reducing the risk of chronic diseases. Unlike ordinary foods, superfoods contain exceptionally high levels of nutrients, making them a powerful addition to a balanced diet. Examples include berries, leafy greens, nuts, seeds, fatty fish, and certain herbs. These foods are not just a passing trend; they are backed by scientific research highlighting their potential to enhance overall well-being. Superfoods are versatile and can be easily incorporated into meals, offering a natural way to support heart health, reduce inflammation, and improve immune function. By focusing on whole, unprocessed ingredients, superfoods provide a simple yet effective way to nourish your body and mind.

The Importance of Superfoods in a Healthy Diet

Superfoods play a vital role in enhancing and maintaining overall health due to their high nutrient content. They are packed with essential vitamins, minerals, and antioxidants that help combat oxidative stress and inflammation, which are linked to chronic diseases. Incorporating superfoods into your diet can improve heart health, support immune function, and boost energy levels. These foods are also known to promote mental clarity and reduce the risk of age-related conditions. By adding superfoods to meals, individuals can address nutritional gaps and support their body’s natural functions. Their dense nutritional profile makes them a valuable addition to a balanced diet, helping to prevent deficiencies and fostering long-term well-being. Superfoods are not just a trend; they are a sustainable way to invest in your health and vitality.

Popular Superfoods

Superfoods like berries, leafy greens, nuts, seeds, and fatty fish are celebrated for their high nutritional value. They are rich in antioxidants, vitamins, and minerals, promoting overall health and vitality.

Berries (Blueberries, Acai, Goji)

Berries are among the most potent superfoods, rich in antioxidants and vitamins. Blueberries are renowned for their high anthocyanin content, which supports brain health and combats aging. Acai berries, native to the Amazon, are packed with heart-healthy fats and fiber. Goji berries have been used in traditional medicine for centuries, offering anti-inflammatory properties and boosting immunity. These berries are versatile, enjoyed fresh, frozen, or in powders, making them easy to incorporate into smoothies, bowls, and snacks. Their vibrant colors reflect their nutrient density, making them a colorful and nutritious addition to a healthy diet. Regular consumption of berries can enhance cognitive function, protect against chronic diseases, and promote overall well-being.

Leafy Greens (Kale, Spinach)

Leafy greens like kale and spinach are powerhouse superfoods, rich in essential vitamins, minerals, and antioxidants. Kale is packed with vitamins A, C, and K, as well as minerals like calcium and iron, making it a great support for bone and immune health. Spinach, similarly, is high in iron and folate, which are crucial for healthy blood cells and energy production. Both greens are low in calories but high in fiber, promoting digestion and satiety. Their antioxidant content helps combat free radicals, reducing the risk of chronic diseases. Incorporating kale and spinach into salads, smoothies, or sautéed dishes is an easy way to boost nutrient intake. These greens are versatile, nutritious, and essential for maintaining a healthy, balanced diet.

Benefits of Superfoods

Superfoods offer numerous health benefits, including boosting energy, enhancing cognitive function, and supporting immune health. They are rich in nutrients, antioxidants, and anti-inflammatory properties, promoting overall well-being and longevity.

Antioxidant-Rich Foods

Antioxidant-rich foods are essential for combating oxidative stress, a key factor in aging and chronic diseases. Superfoods like berries, leafy greens, and nuts are packed with antioxidants such as vitamins C and E, polyphenols, and flavonoids. These compounds neutralize free radicals, protecting cells from damage. Incorporating antioxidant-rich foods into your diet can enhance overall health, improve skin health, and reduce the risk of conditions like heart disease and cancer. Regular consumption supports immune function and promotes longevity. Adding foods like blueberries, spinach, and almonds ensures a robust intake of antioxidants, fostering a healthier lifestyle and protecting against environmental stressors. A diet rich in these nutrients is a proactive step toward maintaining optimal well-being.

Anti-Inflammatory Properties

Superfoods are renowned for their potent anti-inflammatory properties, which play a crucial role in reducing chronic inflammation—a key contributor to various diseases. Chronic inflammation is linked to conditions like arthritis, heart disease, and diabetes, making anti-inflammatory foods essential for preventive health. Superfoods such as turmeric, ginger, and fatty fish (e.g., salmon) contain compounds like curcumin and omega-3 fatty acids, which actively combat inflammation. Leafy greens, berries, and nuts also contribute by providing antioxidants and polyphenols that soothe inflamed tissues. Incorporating these foods into your diet can help mitigate inflammation, improve joint health, and support immune function. By reducing inflammation, superfoods promote overall well-being and lower the risk of chronic illnesses, making them a vital component of a health-oriented lifestyle.

Brain Health and Cognitive Function

Superfoods play a significant role in enhancing brain health and cognitive function by providing essential nutrients and antioxidants. Berries, particularly blueberries, are rich in antioxidants that protect the brain from oxidative stress and improve memory. Walnuts, with their high omega-3 fatty acid content, support neural function and reduce the risk of cognitive decline. Leafy greens like spinach and kale are packed with folate and vitamins that promote healthy nerve function. Additionally, fatty fish such as salmon and mackerel are excellent sources of omega-3s, which are vital for brain development and function. Turmeric, containing curcumin, has potent neuroprotective properties, while dark chocolate’s flavonoids enhance blood flow to the brain. Incorporating these superfoods into your diet can boost focus, memory, and overall mental clarity, supporting long-term brain health and reducing the risk of age-related cognitive issues. A balanced intake ensures optimal brain performance and well-being.

Incorporating Superfoods into Your Diet

Incorporate superfoods into your meals effortlessly by adding them to smoothies, bowls, salads, or snacks. Use powders, seeds, or fresh varieties to enhance nutrition and variety in your diet.

Smoothies and Bowls

Smoothies and bowls are excellent ways to enjoy superfoods, offering a nutrient-packed start to your day or a refreshing snack. Begin with a base of frozen berries, spinach, or kale, then blend in superfoods like acai, chia seeds, or protein powder. Top bowls with granola, coconut flakes, and fresh fruit for added texture and flavor. These versatile options allow you to mix and match ingredients, ensuring variety and maximizing nutritional benefits. Smoothies are also a great way to incorporate powders like spirulina or matcha, boosting energy and vitality. By experimenting with different combinations, you can create delicious and healthy meals that support overall well-being and satisfy your taste buds. Smoothies and bowls are perfect for busy lifestyles, providing a quick yet nourishing way to enjoy the power of superfoods anytime, anywhere.

Salads and Snacks

Salads and snacks are excellent ways to incorporate superfoods into your diet, offering fresh flavors and crunch. Start with a base of leafy greens like kale or spinach, then add superfoods such as berries, avocado, or nuts for a nutrient-packed salad. Snacks like trail mixes with goji berries, almonds, and dark chocolate provide a quick energy boost. Incorporate seeds like chia or flax into homemade granola or yogurt for added nutrition. These options are versatile, allowing you to customize based on your preferences. Salads and snacks are also great for on-the-go meals, ensuring you stay nourished throughout the day. By choosing superfood-rich ingredients, you can create delicious and healthy options that support your overall well-being and keep you satisfied until your next meal;

Breakfast and Baking Options

Breakfast and baking are perfect opportunities to infuse superfoods into your meals. Start your day with a superfood-packed smoothie or oatmeal, adding chia seeds, flaxseeds, or berries for a nutrient boost. For baking, incorporate superfoods like goji berries, dark chocolate chunks, or hemp seeds into muffins, bread, or cookies. Use whole grain flours and natural sweeteners like honey or maple syrup to enhance nutritional value. Breakfast bowls with quinoa, avocado, and a sprinkle of turmeric or cinnamon are also delicious and healthy options. These recipes are versatile, allowing you to experiment with flavors while ensuring a nutritious start to your day. Superfoods in breakfast and baked goods support energy, digestion, and overall well-being, making them ideal for a balanced lifestyle.

Superfoods offer incredible health benefits, boosting energy, immunity, and overall well-being. Incorporating them into your diet is a simple yet powerful step toward a healthier, more vibrant lifestyle.

Final Thoughts on Superfoods

Superfoods are a powerhouse of nutrients, offering a natural way to enhance health and vitality. Their popularity stems from their ability to provide essential vitamins, minerals, and antioxidants that modern diets often lack. By incorporating superfoods into meals, individuals can support immune function, improve energy levels, and reduce inflammation. These foods also promote brain health and may aid in managing chronic conditions. While superfoods are not a magic solution, they are a valuable addition to a balanced diet. They are accessible, versatile, and can be easily integrated into daily routines. Whether through smoothies, salads, or snacks, superfoods offer a delicious and nutritious way to upgrade your health journey. Embrace their benefits and make them a consistent part of your lifestyle for long-term well-being.

Encouragement to Start the Superfood Journey

Embarking on a superfood journey is a simple yet impactful step toward improving your health and well-being. Superfoods are versatile and easy to incorporate into daily meals, making them accessible for everyone. Whether you’re looking to boost energy, enhance mental clarity, or support long-term health, these nutrient-rich foods can make a meaningful difference. Start small by adding a handful of berries to your breakfast or blending leafy greens into a smoothie. Gradually explore new options like nuts, seeds, and whole grains to diversify your diet. The key is consistency—small changes today can lead to significant benefits tomorrow. Take the first step and discover how superfoods can transform your health journey into a delicious and rewarding experience.

Open post

agilent 6890 gc user manual

The Agilent 6890 GC User Manual provides comprehensive guidance for operating and maintaining the Agilent 6890 gas chromatograph. This manual is essential for users to understand the instrument’s features, configuration, and troubleshooting procedures.
It covers installation, startup, and routine maintenance, ensuring optimal performance and accurate results in various analytical applications.

Instrument Overview

The Agilent 6890 GC is a robust and versatile gas chromatograph designed for high-performance separation and analysis. It supports various detection methods and is widely used in pharmaceutical, environmental, and food safety industries.

Key Components of the Agilent 6890 Gas Chromatograph

The Agilent 6890 GC comprises several essential components that ensure its efficient operation. The gas chromatograph includes the column oven, which maintains precise temperature control, and the inlet system, available in split or splitless configurations for flexible sample introduction.
The system also features a flame ionization detector (FID) for sensitive detection of organic compounds. Additionally, the 7683 ALS autosampler enhances throughput by enabling automated injection of up to 100 samples.
The injection tower and detector are integral parts of the system, ensuring accurate and reliable results. These components work together to provide high-performance separation and analysis, making the Agilent 6890 GC a versatile tool in various analytical laboratories.

System Configuration and Compatibility

The Agilent 6890 GC offers flexible system configurations to meet diverse analytical needs. It can be equipped with various detectors, such as the FID, and compatible with autosamplers like the 7683 ALS for high-throughput analysis.
The system supports multiple injection techniques, including split and splitless modes, and is compatible with a wide range of chromatography columns.
Additionally, the 6890 GC integrates seamlessly with Agilent’s ChemStation software, enabling advanced data acquisition and analysis.
Its design ensures backward compatibility with legacy HP and Agilent systems, making it a versatile choice for laboratories upgrading their equipment.
This compatibility and configurability allow the Agilent 6890 GC to adapt to various applications, from routine analysis to complex research studies.

Agilent 6890 GC Specifications

The Agilent 6890 GC is a high-performance gas chromatograph designed for precision and reliability. Key specifications include an oven temperature range of 4°C above ambient to 450°C, with a maximum heating rate of 120°C/min.
The column oven dimensions are 28 x 31 x 16 cm, ensuring efficient thermal control.
The system supports various detectors, including the Flame Ionization Detector (FID), and is compatible with split and splitless injection modes;
The 6890 GC is also designed to work seamlessly with Agilent’s 7683 ALS autosampler, enhancing sample handling capabilities.
Its robust design and advanced features make it suitable for a wide range of analytical applications, from routine testing to complex research.
The specifications ensure high accuracy, sensitivity, and reproducibility, making the Agilent 6890 GC a reliable choice for laboratories worldwide.

Installation and Setup

Installation involves unpacking, inspecting, and connecting peripheral devices like detectors and autosamplers. Ensure proper connections to power and data systems for optimal functionality.

Unpacking and Initial Inspection

When unpacking the Agilent 6890 GC, carefully inspect the instrument for any visible damage or discrepancies. Verify that all components, such as the column oven, inlet, and detectors, are included and properly secured.
Check for accessories like the autosampler, power cord, and documentation. Ensure the system is placed on a stable, level surface in a well-ventilated area.
Compare the contents with the packing list provided in the user manual to confirm everything is accounted for.
If any damage or missing items are found, contact Agilent support immediately. This step ensures a smooth installation and setup process, preventing potential issues during operation. Proper inspection is crucial for maintaining instrument performance and longevity.

Connecting Peripheral Devices

Connect peripheral devices to the Agilent 6890 GC according to the manufacturer’s guidelines to ensure proper functionality and safety. Begin by attaching the autosampler, such as the Agilent 7683, to the instrument, ensuring secure and alignment.
Next, connect detectors like the FID (Flame Ionization Detector) and ensure all gas lines are properly secured to avoid leaks.
Connect the power cord to a suitable electrical outlet and verify the voltage matches the instrument’s specifications.
Additionally, connect any data acquisition systems or software interfaces, such as the Agilent ChemStation, using the provided cables.
Once all devices are connected, power on the instrument and perform a diagnostic check to ensure all components are functioning correctly.
Refer to the user manual for specific connection diagrams and troubleshooting tips. Proper connections are essential for accurate analysis and optimal performance of the Agilent 6890 GC system.

Operating the Agilent 6890 GC

Operate the Agilent 6890 GC by following startup procedures, configuring methods, and monitoring runs. Ensure proper oven temperature control and detector settings for accurate results. Always refer to the user manual for detailed guidelines.

Starting Up the Instrument

To start the Agilent 6890 GC, ensure all peripheral devices are properly connected and powered on. Turn on the instrument using the power switch located on the front panel. Allow the system to complete its self-test and initialization process, which may take a few minutes. Once the system is ready, use the keypad or external software to select and load the desired operating method. Verify that the oven, detectors, and injectors are set to the correct initial conditions. If the instrument does not power up or displays error messages, refer to the troubleshooting section in the user manual. Always ensure the system is at ambient temperature before starting a new run. Proper startup ensures optimal performance and accurate results. For detailed step-by-step instructions, consult the user manual or the operating guidelines provided with the system.

Shutdown and Standby Procedures

Proper shutdown and standby procedures are crucial for maintaining the integrity and longevity of the Agilent 6890 GC. Before shutting down, ensure all runs are completed and the system is in an idle state. Allow the oven to cool down to ambient temperature to prevent thermal stress. Turn off the detector and auxiliary heaters to conserve energy and reduce wear. For standby mode, keep the instrument powered on but inactive to maintain system readiness for future use. If the instrument will be unused for an extended period, disconnect peripheral devices and turn off the power supply. Always follow the recommended shutdown sequence outlined in the user manual to avoid damage or errors during startup. Regularly performing these procedures ensures optimal performance and extends the lifespan of the Agilent 6890 GC. Proper standby and shutdown practices are essential for safe and efficient operation.

Maintenance and Service

Regular maintenance ensures optimal performance and longevity of the Agilent 6890 GC. Follow the manual’s guidelines for routine inspections, cleaning, and replacing consumables. Schedule professional servicing for complex repairs or calibration needs.

Routine Maintenance Tasks

Regular maintenance is crucial for ensuring the Agilent 6890 GC operates efficiently and delivers accurate results. Key tasks include cleaning the injection port, checking detector performance, and verifying gas flow rates. Users should also inspect and replace worn-out septa and column ferrules periodically. Additionally, it is important to clean the column oven and ensure proper ventilation to prevent overheating. The manual recommends scheduling professional calibration annually or as needed to maintain precision. Properly documenting maintenance activities helps track instrument performance and ensures compliance with laboratory standards. By adhering to these routine tasks, users can extend the lifespan of the instrument and maintain reliable analytical outcomes.

Replacing Gas Tanks and Consumables

Replacing gas tanks and consumables on the Agilent 6890 GC is essential for maintaining optimal performance and preventing contamination. Users should regularly inspect gas lines for leaks and replace them if damage is detected. The manual provides step-by-step instructions for safely disconnecting and reconnecting gas cylinders, emphasizing the importance of using high-quality, clean gases. Consumables such as septa, column ferrules, and inlet liners should be replaced every 100-200 injections, depending on usage. Proper disposal of old consumables and adherence to safety protocols are critical to avoiding hazards. By following the recommended replacement schedule, users can ensure consistent chromatographic results and extend the lifespan of the instrument. Always refer to the user manual for specific guidelines tailored to the Agilent 6890 GC configuration and operating conditions.

Open post

322 pace bus schedule pdf

Overview of Pace Bus Route 322

Pace Bus Route 322 connects key destinations like Morton West High School and Yorktown Center, operating daily with varying weekday and weekend frequencies. The PDF schedule provides essential trip planning details, including real-time updates and service alerts, ensuring convenient travel across suburbs like Oak Brook and Lombard.

Route 322 is a vital Pace Bus service connecting suburbs like Oak Brook, Lombard, and Cicero. It operates daily, linking key destinations such as Morton West High School and Yorktown Center. The route spans from 54th/Cermak Station to Yorktown Center, offering convenient access to shopping, education, and employment hubs across the western suburbs, with schedules available in PDF format for easy planning.

1.2 Key Destinations and Stops

Route 322 serves major stops including 54th/Cermak Station, Morton West High School, and Yorktown Center. It connects Oak Brook, Lombard, Hillside, Broadview, North Riverside, Cicero, Westchester, and Berwyn. The route offers access to shopping centers, schools, and transit hubs, making it a crucial link for residents and commuters in the western suburbs.

1.3 Importance of the PDF Schedule

The PDF schedule for Route 322 offers a comprehensive overview of service times, stops, and route variations. Downloadable and printable, it helps passengers plan trips offline, ensuring accessibility without internet. Regular updates reflect schedule changes, making it an essential tool for reliable travel planning and staying informed about service adjustments.

Detailed Route Information

Pace Bus Route 322 serves multiple suburbs, including Oak Brook, Lombard, and Berwyn, connecting key destinations like Morton West High School and Yorktown Center with frequent stops and varied service times.

2.1 Served Areas and Communities

Pace Bus Route 322 serves several communities, including Oak Brook, Lombard, Oakbrook Terrace, Hillside, Broadview, North Riverside, Cicero, Westchester, and Berwyn. These areas benefit from reliable transportation, linking residential neighborhoods, commercial centers, and educational institutions, fostering connectivity and accessibility for daily commuters and local residents.

2.2 Major Stops and Landmarks

Key stops on Route 322 include 54th/Cermak Station, Yorktown Center, and Morton West High School. These landmarks are crucial for passengers, providing connections to CTA services, shopping hubs, and educational institutions, ensuring convenient access to essential destinations along the route.

2.3 Transfer Points and Connections

Route 322 offers seamless transfers at 54th/Cermak Station, connecting to CTA Pink Line and other Pace routes. Additional connections are available at Yorktown Center and Morton West High School, linking passengers to Metra services and regional transit networks for efficient travel across Chicago’s suburbs.

Schedule Details and Frequency

Route 322 operates Monday-Friday from 4:36 AM to 12:44 AM with 105 scheduled trips and Saturday from 4:59 AM to 12:05 AM with 90 trips. The PDF schedule details service frequency and timing for efficient trip planning.

3.1 Weekday Schedule

Pace Bus Route 322 operates on weekdays from 4:36 AM to 12:44 AM, with 105 scheduled trips. The weekday schedule is detailed in the PDF, ensuring reliable connections between key stops like Morton West High School and Yorktown Center.

3.2 Weekend and Holiday Schedule

On weekends and holidays, Route 322 runs from 4:59 AM to 12:05 AM, with 90 scheduled trips. The PDF schedule outlines reduced frequencies, ensuring service continuity to stops like 54th/Cermak Station and Yorktown Center, accommodating commuters and leisure travelers alike.

3.4 Special Service Alerts

Stay informed about service adjustments on Route 322 via real-time alerts. Special alerts notify passengers of delays, detours, or schedule changes due to events, construction, or unforeseen circumstances. Access these updates through the Pace website, Moovit app, or subscribe to route-specific notifications to plan your trip efficiently.

Accessing the PDF Schedule

Download the Pace Bus Route 322 PDF schedule from the official Pace website or via the Moovit app for offline access. Print it for easy reference.

4.1 Downloading from the Pace Website

Visit the official Pace Bus website to download the Route 322 PDF schedule. Navigate to the “Schedules” section, select Route 322, and download the PDF for detailed timetables, stops, and service alerts. This ensures easy access to trip planning information anytime, even without internet.

4.2 Using the Moovit App for Offline Access

Download the Moovit app to access the Pace Bus Route 322 schedule offline. Simply search for Route 322, save the PDF schedule, and plan your trips without internet. This feature is ideal for commuters needing reliable access to bus information on the go.

4.3 Printing the Schedule

To print the Pace Bus Route 322 schedule, download the PDF from the Pace website. Once downloaded, open the PDF and select the print option. Having a printed copy ensures easy access to timetables and stops, helping plan your commute efficiently without needing digital devices.

Reading and Understanding the Schedule

Mastering the PDF schedule is essential for understanding arrival times and route details. Key elements include time points, route variations, and specific symbols that guide passengers effectively.

5.1 Interpreting Time Points

Time points on the PDF schedule indicate specific stops and arrival times, helping passengers plan their journeys. These points are synchronized to ensure punctuality and provide a clear timeline for reaching destinations like Yorktown Center and Morton West High School efficiently.

5.2 Understanding Route Variations

Route 322 offers variations in service, with different schedules for weekdays, weekends, and holidays. The PDF schedule highlights these changes, ensuring passengers are aware of adjusted arrival times and stops, particularly around major destinations like 54th/Cermak Station and Yorktown Center.

5.3 Key Symbols and Notations

The PDF schedule uses symbols like arrows for direction and bullets for stops. Footnotes explain service variations, while bold text highlights major timing points. Understanding these notations helps passengers interpret the schedule accurately, ensuring they catch the right bus at the correct time.

Real-Time Tracking and Alerts

Use Pace Bus Tracker for live updates on Route 322. Set alerts for schedule changes or delays to stay informed and plan your trip efficiently.

6.1 Using Pace Bus Tracker

Access real-time updates for Route 322 using the Pace Bus Tracker. Track your bus location, view arrival times, and receive service alerts directly on the Pace website or through the official app, ensuring timely and informed travel decisions every day.

6.2 Setting Up Route Alerts

Customize your commute by setting up alerts for Route 322 through the Pace Bus Tracker. Receive notifications for delays, schedule changes, or disruptions via email or app, keeping you informed and prepared for any service adjustments affecting your travel plans.

6.3 Benefits of Real-Time Updates

Real-time updates for Route 322 offer live tracking, minimizing wait times and enhancing travel efficiency. Stay informed about delays, traffic, or service changes, enabling better decision-making. Accessible via Pace Bus Tracker or apps like Moovit, these updates ensure a smoother, more reliable journey across the route’s 116 stops.

Additional Services and Features

Pace Bus Route 322 offers bike racks for cyclists, accessibility features for passengers with disabilities, and customer service support for trip planning and assistance, enhancing rider convenience.

7.1 Bike Racks on Buses

All buses on Pace Route 322 are equipped with bike racks, accommodating cyclists by providing a convenient space to secure bicycles during transit, fostering an eco-friendly and multi-modal commute option for passengers traveling throughout the served communities.

7.2 Accessibility Features

Pace ensures accessibility on Route 322 with features like ramps, priority seating, and wheelchair lifts, accommodating passengers with disabilities. Service animals are welcomed, and the PDF schedule highlights accessible stops, aiding passengers with mobility needs in planning their trips effectively.

7.3 Customer Service Contact

Passengers can reach Pace Bus customer service for inquiries, feedback, or assistance with Route 322 via phone, email, or the website. The PDF schedule includes contact details, ensuring riders can easily access support for trip planning, lost items, or service-related questions.

Planning Your Trip

Plan your journey efficiently using Pace Bus Route 322’s resources. Utilize the PDF schedule, online trip planner, and real-time tracker to optimize your commute, ensuring punctuality and convenience across all served areas.

8.1 Using the Trip Planner Tool

The Trip Planner Tool simplifies your journey by allowing you to input start and end points, view optimal routes, and receive real-time updates. It integrates with the Pace Bus 322 schedule, helping you plan efficiently and access detailed trip information instantly.

8.2 Optimizing Your Commute

Optimize your commute by identifying peak hours, planning around major stops, and utilizing the PDF schedule for precise arrival times. Combining real-time alerts with route variations ensures a smooth and efficient travel experience on Pace Bus Route 322.

8.3 Managing Delays and Disruptions

Stay informed about service alerts and track real-time updates using the Pace Bus Tracker. Downloading the PDF schedule ensures access to essential information offline, helping you adjust plans during disruptions and minimizing delays on Route 322.

Key Stops and Connections

Route 322 connects major stops like 54th/Cermak Station, Morton West High School, and Yorktown Center, offering seamless transfers to CTA and Metra services for efficient travel across the region.

9.1 54th/Cermak Station

54th/Cermak Station is a key stop on Route 322, serving as a major transfer point to the CTA Pink Line. It provides convenient access to Chicago, connecting suburban commuters to the city’s transit network with frequent bus departures and real-time schedule updates available via the Pace Bus Tracker.

9.2 Yorktown Center

Yorktown Center is a major destination on Route 322, offering convenient access to shopping and dining. As a key terminal point, it provides frequent bus departures and connections to other Pace routes. The PDF schedule details weekday and weekend frequencies, ensuring easy trip planning for commuters and shoppers alike.

9.3 Morton West High School

Morton West High School is a key stop on Route 322, serving students and staff with reliable bus service. The PDF schedule details arrival and departure times, ensuring convenient access during weekdays and connecting to nearby communities like Berwyn and Cicero.

Tips for Using the Route

  • Arrive early at your stop to account for any delays.
  • Use the PDF schedule to plan your commute efficiently.
  • Stay informed about service alerts for a smooth journey.

10.1 Arriving Early

Arriving early at your stop is crucial to ensure you don’t miss your bus. Check the PDF schedule for exact departure times and account for potential delays. Early arrival helps you secure your spot and start your journey stress-free, especially during peak hours or unexpected disruptions.

10.2 Understanding Fare Options

The 322 Pace Bus schedule PDF outlines various fare options, including cash, Ventra cards, and mobile payments. Exact change is required for cash payments, while Ventra cards offer convenient reloading. Reduced fares are available for students, seniors, and disabled riders with proper identification, ensuring affordable transit for all passengers.

10.3 Staying Informed

Stay informed about Route 322 by using the Pace Bus Tracker for real-time updates and tracking. Subscribe to service alerts to receive notifications about delays or changes. The PDF schedule also provides essential details for trip planning, ensuring a smooth and well-prepared journey on Route 322.

Community Impact

Route 322 enhances connectivity for residents, supporting local businesses and reducing traffic congestion. It promotes eco-friendly transportation and provides affordable access to education, employment, and essential services across served communities.

11.1 Economic Benefits

Route 322 boosts local economies by connecting residents to job centers, retail hubs, and educational institutions. It supports small businesses, enhances property values, and reduces traffic congestion, fostering sustainable growth and affordability for commuters in Oak Brook, Lombard, and surrounding areas.

11.2 Environmental Impact

By providing an efficient public transit option, Route 322 reduces carbon emissions from private vehicles, lowering air pollution. It promotes eco-friendly commuting, supports urban sustainability goals, and helps mitigate traffic-related environmental stress in the communities it serves.

11.3 Social Benefits

Route 322 enhances community connectivity by linking residents to employment, education, and recreational hubs. It fosters inclusivity for all passengers, including students and seniors, ensuring accessible transportation and improving the quality of life for diverse populations across the served areas.

Route 322 provides essential connectivity, linking key destinations with reliable service. The PDF schedule ensures informed travel, making commuting efficient and accessible for all passengers in the served areas.

12.1 Summary of Key Points

  • Route 322 connects suburbs like Oak Brook and Lombard, serving key stops such as Morton West High School and Yorktown Center.
  • The PDF schedule offers detailed timetables for weekdays, weekends, and holidays, ensuring accessible trip planning.
  • Real-time tracking and service alerts enhance commuting convenience, while bike racks and accessibility features cater to diverse passenger needs.

12.2 Encouragement to Use the Service

Using Pace Bus Route 322 is a reliable and convenient option for daily commutes. With real-time tracking, bike racks, and accessible stops, it offers a hassle-free travel experience. By choosing this service, you support eco-friendly transportation and contribute to reducing traffic congestion, making it a smart choice for both commuters and the environment.

Open post

re revelations trophy guide

Welcome to the Resident Evil Revelations Trophy Guide! This comprehensive guide covers everything you need to unlock all 56 trophies, including campaign, Raid Mode, and collectibles. Start your journey to 100% completion today!

Overview of the Game and Trophy System

Resident Evil Revelations is a survival horror game featuring a single-player campaign and multiplayer Raid Mode. The trophy system includes 56 trophies: 48 Bronze, 5 Silver, 2 Gold, and 1 Platinum. Earning all trophies requires completing the campaign, finding collectibles, and mastering Raid Mode. Trophies range from story progression to challenging achievements like beating the game on Infernal difficulty. Difficulty is moderate (6/10), with completion estimated at 20-30 hours. This guide provides a roadmap to unlock every trophy, ensuring a smooth path to 100% completion.

Campaign Trophies

Earn trophies by completing story missions, hidden challenges, and specific tasks. Some unlock naturally, while others require precise actions or higher difficulty playthroughs.

How to Earn Bronze Trophies

Bronze trophies are the most common and often unlocked by completing specific tasks or progressing through the campaign. For example, the A Packaged Deal trophy is earned by completing Episode One using only the knife with Claire or Barry. Similarly, Die Another Day is awarded for finishing Episode One on any difficulty. Many bronze trophies are tied to story progression, while others require completing missions with specific constraints. With 48 bronze trophies available, players can gradually work toward 100% completion by focusing on these achievable challenges.

How to Earn Silver Trophies

Silver trophies in Resident Evil Revelations require more effort and dedication. For instance, the Cutting Edge trophy is unlocked by clearing Episode One using only the knife. Similarly, Let Lounging Lickers Lie is earned by avoiding combat with Lickers entirely. These trophies often involve specific gameplay challenges or strategic playstyles. With only five silver trophies available, players must master particular skills or complete difficult tasks to claim them, making them a satisfying step toward full completion.

How to Earn Gold and Platinum Trophies

Earning gold and platinum trophies in Resident Evil Revelations is the ultimate challenge. The platinum trophy is awarded for obtaining all other trophies, requiring a full completion of the game. The gold trophy, Triple Play, is unlocked by beating the campaign three times with different characters. These trophies demand dedication, skill, and a deep understanding of the game mechanics. With only two gold trophies and one platinum, players must be meticulous in their approach to unlock these prestigious achievements and showcase their mastery of the game.

Raid Mode Trophies offer unique challenges and rewards, with stages across various difficulties. Mastering these requires skill and strategy, making it a must for completionists.

Completing All Stages on Different Difficulties

To unlock all Raid Mode trophies, you must complete 20 stages across three increasing difficulties: Chasm, Trench, and Abyss. Each difficulty introduces tougher enemies and stricter challenges, requiring precise strategy and skill. Completing stages on higher difficulties unlocks better rewards and progression toward Chaos Mode. Use upgrades and weapons wisely to tackle waves of enemies efficiently. Mastering these stages is essential for 100% completion and achieving the ultimate Raid Mode trophies.

Ghost Ship and Chaos Mode Strategies

Chaos Mode offers the ultimate challenge in Raid Mode, requiring mastery of all stages. On the Ghost Ship, enemies are relentless, so focus on upgrading your weapons and using cover effectively. Prioritize high-damage weapons like shotguns and magnums to take down bosses quickly. Stay mobile to avoid overwhelming enemy waves and conserve ammo for critical moments. Teamwork is crucial in co-op, with one player distracting enemies while the other deals damage. With practice and strategy, you can conquer Chaos Mode and unlock exclusive rewards.

Hand Print Collectibles

Discover all 30 hidden hand prints throughout the game to unlock exclusive trophies. Use your scanner to locate them in cleverly concealed spots for 100% completion.

Locations of All 30 Hand Prints

The 30 hand prints are hidden across various episodes in Resident Evil Revelations. Most are found in Episodes 1-4, with a few in the bonus content. Use your scanner to detect them in well-hidden spots like walls, doors, and objects. Episode 1 has the most, while later episodes have fewer but harder-to-find prints. Thoroughly explore every room, and don’t miss hidden areas or interactive items. This collectible hunt is essential for 100% completion and unlocking related trophies.

Tips for Finding Hidden Hand Prints

To efficiently locate all 30 hand prints, use the Genesis scanner regularly, as it highlights hidden collectibles. Thoroughly examine walls, doors, and interactive objects. Check corners, crates, and desks, as prints are often tucked away in hard-to-spot locations. Replay chapters to ensure no areas are missed. Use the scanner in every room, even if it seems empty, to avoid overlooking hidden prints. This methodical approach ensures you’ll find all hand prints and unlock related achievements without frustration.

Difficulty-Specific Trophies

Earn trophies by conquering challenges across varying difficulties. Complete the game on lower settings for easier achievements and progress to Infernal for the ultimate test of skill.

How to Beat the Game on Infernal Difficulty

Beating Resident Evil Revelations on Infernal Difficulty requires precision and strategy. Ensure you’re well-prepared with upgraded weapons and ample ammo. Use cover effectively and avoid unnecessary confrontations. Conserve health items and exploit enemy weaknesses. Completing the game on lower difficulties first will unlock powerful gear, making Infernal more manageable. Stay patient and observant, as one mistake can be costly. This challenging mode is a true test of skill, but with careful planning, you’ll unlock the elusive Platinum Trophy.

Challenges and Rewards for Lower Difficulties

Lower difficulties in Resident Evil Revelations offer a great starting point for new players. Completing the game on Casual or Normal unlocks essential rewards, such as weapon upgrades and bonus content. These modes allow you to familiarize yourself with the story and gameplay mechanics without extreme pressure. Earning trophies like First Victim and Traces of Tragedy becomes more accessible, providing a solid foundation for tackling higher challenges like Infernal Difficulty later on. Use this opportunity to refine your skills and build a strategic approach for tougher playthroughs.

Specific Achievement Guides

Dive into detailed strategies for earning trophies like A Packaged Deal and Die Another Day. Learn how to unlock these challenging achievements with precise tips and tricks for success.

A Packaged Deal and Die Another Day Trophies

Earn the A Packaged Deal trophy by defeating the final boss without taking damage. For Die Another Day, complete the game four times, alternating between Chris and Jill. Use stealth and precise aiming to avoid damage, and save frequently to manage progress. These achievements require skill and patience but are rewarding once unlocked. Follow detailed guides for optimized strategies to master these challenges and enhance your gameplay experience.

Let Lounging Lickers Lie and Cutting Edge Trophies

Unlock the Let Lounging Lickers Lie trophy by avoiding all Lickers during a specific chapter. For Cutting Edge, complete Episode 1 using only the knife with Claire or Barry. This requires precise stealth and avoiding enemies. Use cover and distractions to progress undetected. Save frequently to manage resources. These trophies test your ability to adapt and survive without firepower, making them a challenging yet rewarding experience for players seeking 100% completion.

Tips and Tricks for 100% Completion

Explore thoroughly for hidden collectibles and master stealth mechanics to avoid unnecessary combat. Start with lower difficulties to unlock essential items for higher challenges. Consistently save progress to minimize retries and optimize your strategy for a smooth journey to Platinum.

Preparing for Infernal Mode

Preparing for Infernal Mode requires strategic planning and mastery of the game mechanics. Start by completing the campaign on lower difficulties to unlock essential upgrades and collectibles. Ensure you’ve gathered all 30 hand prints, as they provide crucial bonuses. Upgrade your weapons to their maximum potential, focusing on ammo capacity and firepower. Learn enemy patterns and optimal routes to minimize damage taken. Stockpile ammo and health items, and avoid unnecessary confrontations. Finally, practice stealth and precision, as one mistake can be deadly in Infernal Mode. Stay focused and patient for a successful run.

Maximizing Raid Mode Rewards

To maximize Raid Mode rewards, focus on completing stages on higher difficulties and utilizing strong characters with upgraded weapons. Efficiently collect BP by defeating enemies and breaking crates, and equip boosters to enhance your earnings. Prioritize stages with high reward potential, such as later levels in Chaos Mode. Regularly upgrade your weapons and abilities to tackle tougher challenges. Consistent play and strategic planning will yield the best results, providing ample resources for both Raid Mode progression and campaign trophy requirements.

Completing the Resident Evil Revelations Trophy List is a rewarding journey that tests skill and dedication. With 56 trophies achieved, players can celebrate their mastery of the game.

Final Thoughts on Completing the Trophy List

Earning all 56 trophies in Resident Evil Revelations is a testament to skill and perseverance. The journey spans campaign and Raid Mode challenges, with collectibles and high-difficulty achievements. While the process can be daunting, the sense of accomplishment is immense. Balancing strategy and patience, especially in Infernal Mode, is key. With dedication, players unlock the coveted Platinum Trophy, celebrating their mastery of this thrilling survival horror experience. The game’s design ensures a rewarding path for those willing to embrace the challenge.

Posts navigation

1 2 3 4 5 6 7 18 19 20
Scroll to top